Sometimes there is a need to perform a task on a whole bunch of images. I’m not talking about any sort of in depth image manipulation, but rather tasks that are tedious to do image by image. A good example is reducing the size of a series of images to be used on a website, or perhaps converting them from one image format to another. The easiest way of doing this is by means of the ImageMagick command line utility mogrify. Here is an example:
mogrify -auto-orient -format png *.jpg
This converts all the jpg files in a folder to png files. The -auto-orient option adjusts an image so that its orientation is suitable for viewing. To add the additional task of reducing the size of the image by 50%, we just have to add the -resize 50% option.
Now using ImageMagick does require one to learn about the command line. On a Mac this is best provided by iTerm2. It basically provides access to all the folders in a low-level way, so that commands are provided by means of a command-line interface (a bit old-fashioned, but highly efficient for processing files).
Vintage “normal” lenses most often range from 40mm to 58mm, although the greatest number of theses lenses fall in the range 50-58mm. A lens which satisfies the ideal of being “normal” has a focal length close to the diagonal of the film format. So, 24×36mm = 43mm. 35mm is an exception to this rule – when Oskar Barnack developed the original Leica he fitted it with a 50mm Elmax to ensure the most could be done with the small negative area. From that, the 50mm became the ubiquitous standard. With the proliferation of 35mm single lens reflex (SLR) cameras, manufacturers in the early years tended to fit 55-58mm lenses. But why was this the norm instead of 50mm?
There are a variety of reasons. Let’s start at the beginning.
When Ihagee (Dresden) released the worlds first 35mm SLR in 1936 it had a series of standard lenses, but basically there were two categories: the slow 5.0cm lenses which ranged from f/2.8 to f/3.5 (e.g. Tessar, Xenar), and the marginally faster, 5.0cm/5.8cm f/1.9-2.0 lenses, e.g. the 5.8cm f/2 Biotar (developed for the Exakta). The first post-war Exakta did not appear until 1949, the Exakta II, along with a cornucopia of standard lenses from numerous manufacturers, but the fastest 50mm lens was still the Zeiss Tessar f/2.8.
The “… to 60-mm…” was included in the normal-lens category only because such lenses are frequently supplied as standard optics on single-lens reflexes. The reason is that in many cases the designers have found it easier to meet the special requirements of through-the-lens focusing by going to a slightly longer focal lens. Fifty-eight mm is the most common choice.
Bob Schwalberg, “Interchangeable lenses by the carload”, Popular Photography, pp.36-38,197 (May, 1956)
The 35mm SLR experienced a rapid increase in popularity among amateur photographers in the 1950s, especially after manufacturers realized that the installation of a prism viewfinder made handling this type of camera much easier. With this came the need for faster lenses, for two reasons – the ability to take pictures in poor lighting conditions, and a brighter viewfinder image makes it easier to focus. Lens such as the Biotar 58mm f/2 were considered to have a long focal length – to the amateur this was less than favourable, because they would get less coverage than 50mm. Over the course of the 1950s, manufacturers worked on new lens configurations to increase the speed of 50mm lenses, however 55mm and 58mm lenses still maintained the edge in terms of speed.
Fig.1: The two fastest pre-1950 35mm normal SLR lenses. Note the angle-of-view (horizontal) between 50mm and 58mm is not that different.
The original Asahi Takumar lenses which evolved with the 1952 Asahiflex (M37 mount), only included a single 50mm lens, with a speed of f/3.5. Both the 55mm (f/2.2) and 58mm (f/2.2,2.4) lenses had faster speeds. The 58mm f/2.4 in 1954, which became the standard lens for the Asahiflex II. The Auto Takumar’s focused on 55mm lenses with both f/1.8 and f/2.0 lenses. It was not until the Super-Takumar’s appeared in 1964, that the fast 50mm became more normal, with the f/1.4 lens. Canon didn’t produce much in the way of fast SLR lenses until the FL series lenses, introduced for the Canon FX, and FP, which debuted in 1964. Here there was a fast 50mm f/1.4, yet the f/1.2 lenses were still in 55mm and 58mm. In truth, even 50mm lenses faster then f/1.8 did not appear in Japan until the mid-1960s. many of the super-fast 50mm lenses were developed for rangefinder cameras, and never extended to SLRs.
The post-war German 50mm lenses did not really get much faster than f/1.8. This is in part because although the competition in Japan spurned a lens “speed-war”, the same was not true in Germany. The fastest lenses of the early 1950s was still the Biotar 58mm f/2, and Meyer Primoplan 58mm f/1.9. By 1960, at least for the Exakta Varex there was now a 50mm f/2 in the guise of the Zeiss Pancolar. By 1962 Exakta brochures had sidelined the Biotar 58mm, in favour of the Meyer Optik Domiron 50mm f/2. The Japanese had however established f/1.8 as the standard speed for a 50mm. The Zeiss Pancolar 50mm f/1.8 is an extremely good lens, but did not appear until 1964. Similarly the Görlitz Oreston 50mm f/1.8 did not appear until 1965. One of the reasons these “average” speed lens were produced is volume. The production of Praktica cameras in the mid-1960s reached 100,000 units per year, all of which needed a standard lens. It was all about economics.
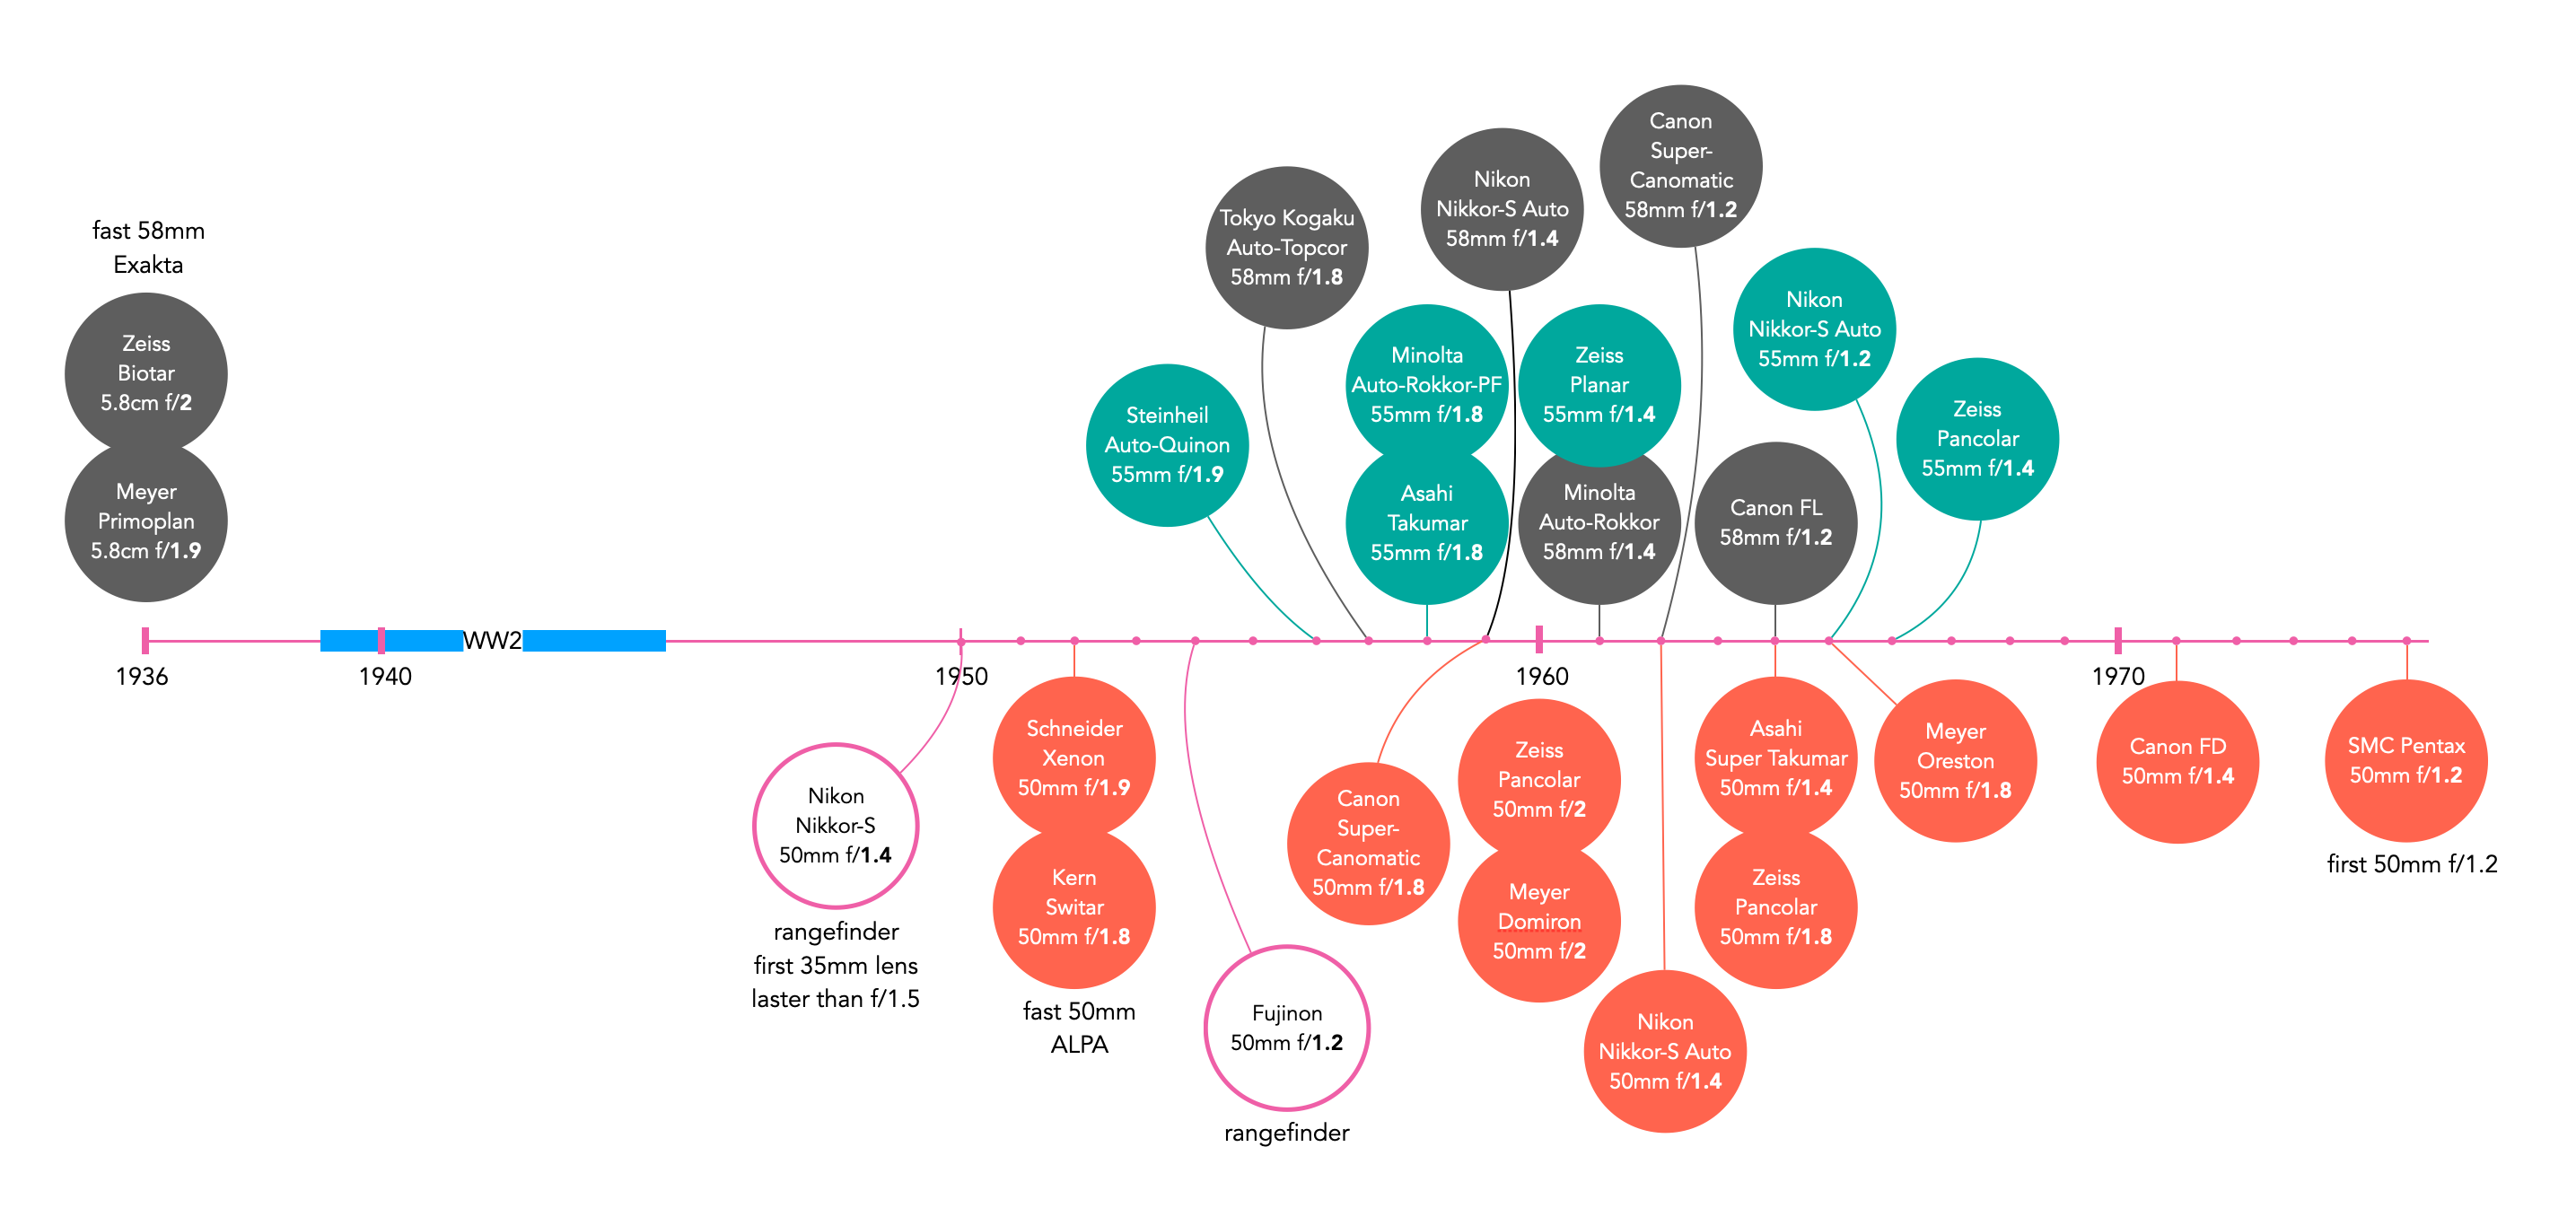
Fig.2: Speed milestones in 55/58mm and 50mm lenses. Note that while a 50mm f/1.2 lens for rangefinder cameras existed as early as 1954, it would not be until 1975 that one appeared for 35mm SLRs.(note that the diagram may not represent every possible lens)
It was not the same in the world of 35mm rangefinder cameras. There was already a fast pre-war lens, the Zeiss Sonnar 50mm f/1.5 (7 elements/3 groups). The original Sonnar was designed with six elements in three groups, which would allow a maximum of an f/2 aperture. In 1931, a redesign with a new formula was developed with seven elements in three groups, allowing a maximum aperture of f/1.5. But the problem with the Sonnar design was that for shorter focal lengths, e.g. 50mm, it had a short back-focal-distance (BFD) which although being an advantage in rangefinder cameras, made them incompatible with most SLR cameras due to the space taken up the (retracting) mirror (which increases the flange focal distance). The set-up is illustrated in Figures 3 and 4. In Figure 3, the lens is shown how it would normally appear in a Contax rangefinder camera. However if the same lens were used in a 35mm Exakta (Figure 4), there would be an issue because the BFD would be too short because of the increase length of the flange focal distance, which is due to the clearance needed by the mirror.
Fig.3: Lens to film on a Sonnar 50mm f/1.5 lens attached to a 35mm Contax rangefinder
Fig 4: Lens to film on a Sonnar 50mm f/1.5 lens superimposed on a 35mm SLR.
This illustrates the biggest problem with making a fast 50mm lens was the fact that the addition of a mirror in the SLR meant that lenses had to be further from the film plane, requiring a redesign of the optical formula of the lenses. The easier solution was to marginally increase the focal length.
Trying to adapt the Sonnar design to 50mm was probably cost prohibitive as well. The Sonnar’s had large glass elements with massive core thickness, which required very thick sheets of raw glass, and they had strongly spherical lens surfaces. The latter issue lead to more issues when cementing lenses together, i.e. it was time consuming and required great precision. The Tessar 50mm’s on the other hand could be produced much more efficiently which made them less expensive to produce. The only real Sonnar design for SLRs was produced by Asahi, the Takumar 58mm f/2 from 1956 (6 elements/4 groups).
Partly to more easily provide clearance, for the moving mirror, and partly to produce a larger viewing image, the post-pentaprism wave of SLRs got off to a slow start in the early fifties with 58-mm standard lenses. Since physiological factors dictate an eyepiece of approximately 58mm focus, the choice of this focal length for the normal lens gave a 1-1, fully life-sized viewing image.
Bob Schwalberg, “The shifty fifty”, Popular Photography, pp.73-75,118,119 (Sep., 1970)
Some of the reasons were likely simpler than all that. When Carl Zeiss released the Contax S, the world’s first 35mm production SLR camera with an eye-level prism viewfinder and exchangeable lenses in 1949, the camera came with the Biotar 58mm f/2 as the kit lens. The popularity of the Biotar, spurned others to adopt a similar lens design. One of the reasons the Biotar had a large following was because it was felt that it provided a deeper and more three-dimensional image. There were many Biotar types of lenses, but at 58 mm the image in the prism finder had approximately the same scale as one viewed with a naked eye. Last but not least, as we have seen in a previous post, 58mm approximates the 30° central symbol recognition of the HVS, which means it quite nicely fits into the scope of focused human vision.
Aside from mechanical issues, there may have been other more aesthetic reasons for the 55mm/58mm lens frenzy. There is an experiential rule that says a portrait lens for half-body portrait should be about 1.5 times the focal length of a “normal” lens (2 times for head-shots). If we take the normal range to be about 40-55mm, this would make an appropriate lens about 60-82.5mm. So a 58mm lens is quite close to the minimum for half-body portraits. No surprise that the upper bound is also close to 85mm, a favourite with portrait photographers. Why did this matter? Because of the large market for amateur photographers in the 1950s who were interested in taking pictures of family etc.
The trend of 55/58mm lenses had reversed itself by the mid-1960s, with 50mm lenses becoming faster likely due to the advent of faster glass, and better optical formulae.
Do we ever stop to question why we take photographs? There are many reasons of course. Here are some of the main ones. Note that some photographs may span more than one category.
① To convey objective information − These may be the easiest type of photographs to take, because they are of the documentary type. This might include photographs of a dish to illustrate a recipe, or portray the architectural details of a vintage door, or even artistic differences between fire hydrants.
Documenting a drink in a cafe…
…or a huge bunny in Montreal
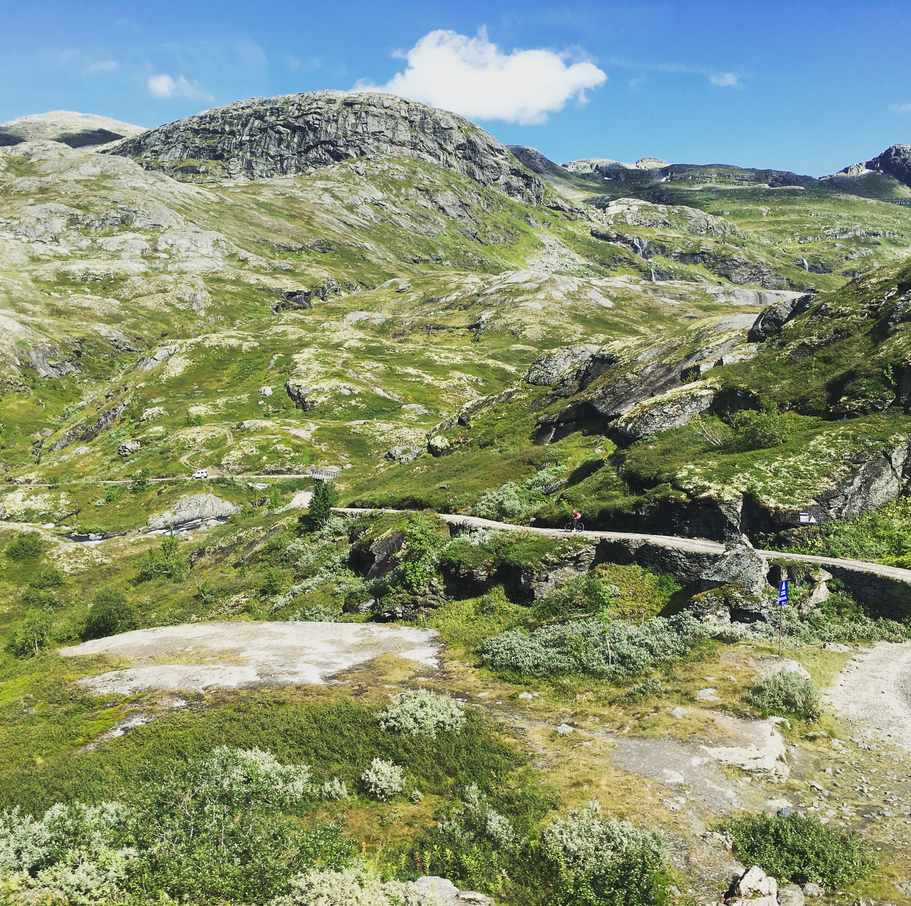
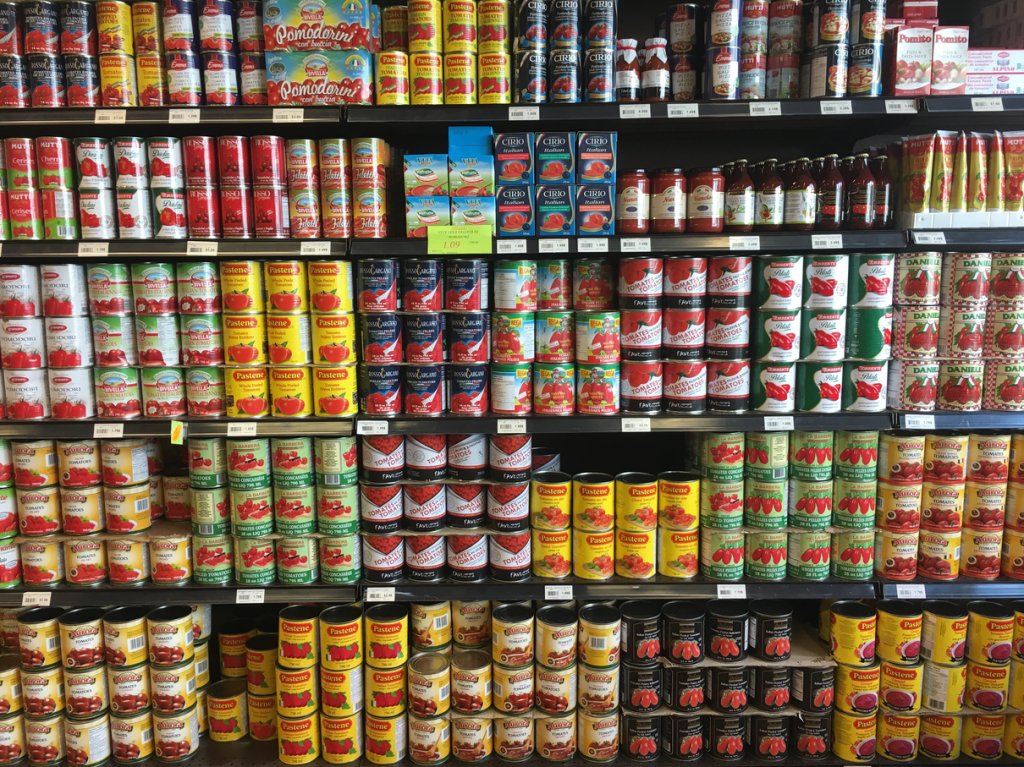
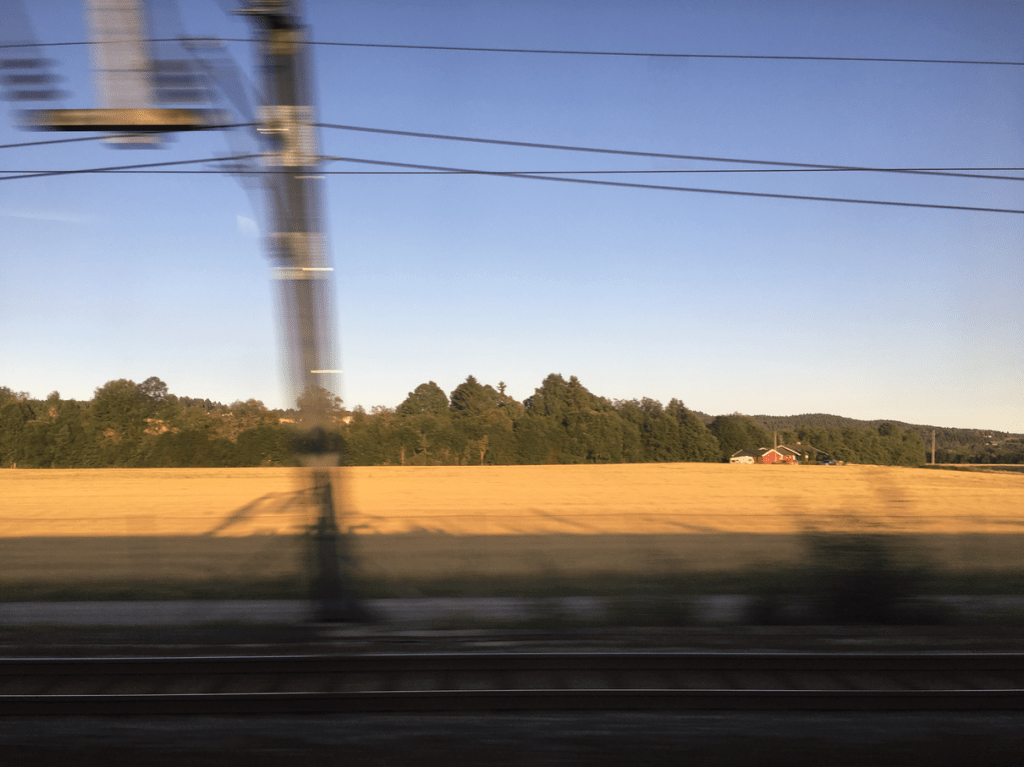
② To accurately reproduce natural or human-made objects or scenes − Not quiet the same a the documentary image, which is a clear interpretation of one specific thing. The reproductive image is more concerned with a general representation. A good example are landscapes.
Reproducing a treeless landscape in Norway…
…or canned tomatoes in an Italian grocery
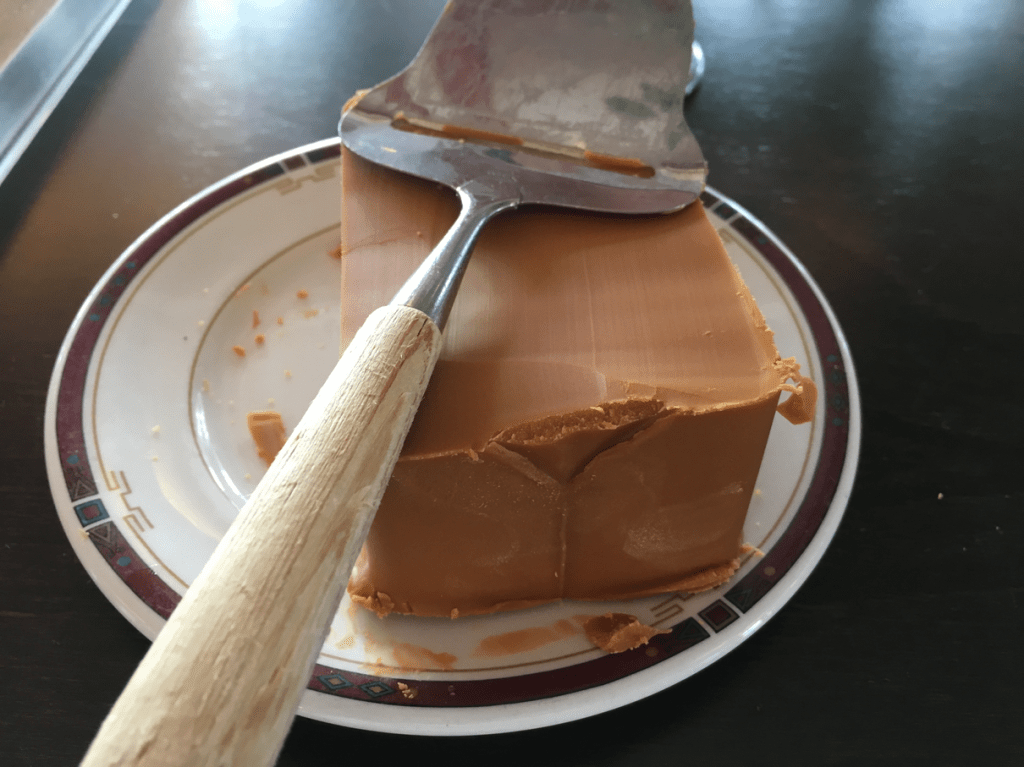
③ To represent a memory of people, places or things − This type of photograph is focused more on emotion, to provide a sense of nostalgia of experiences past.
A memory of Peggy’s Cove…
…or eating brown cheese
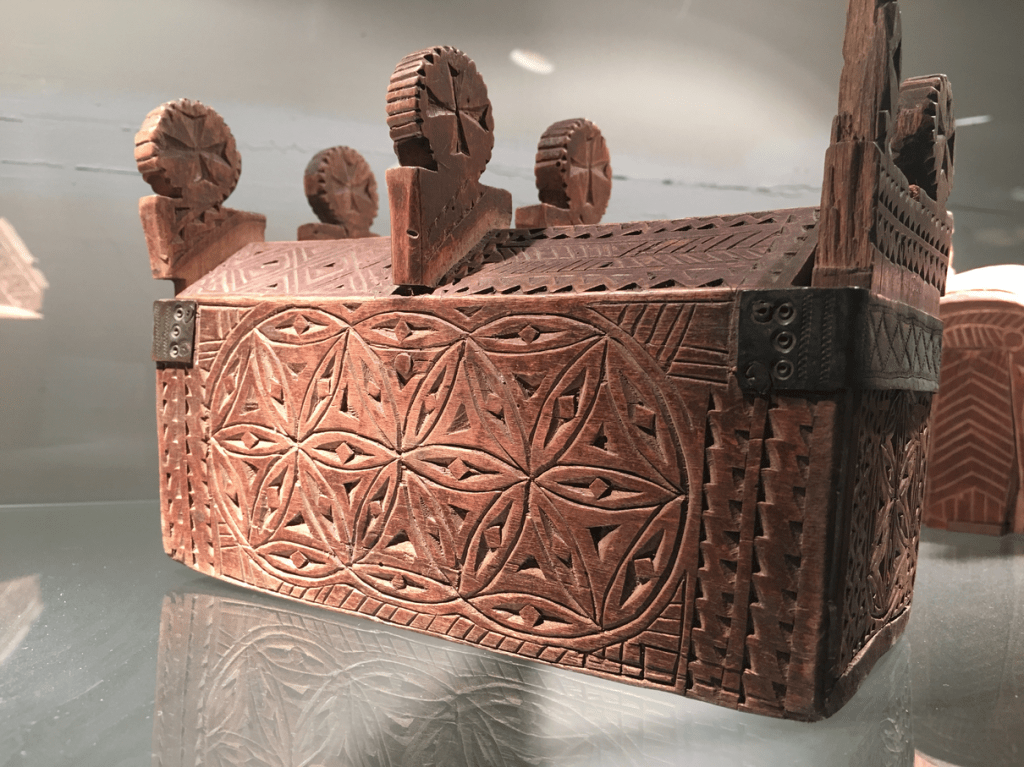
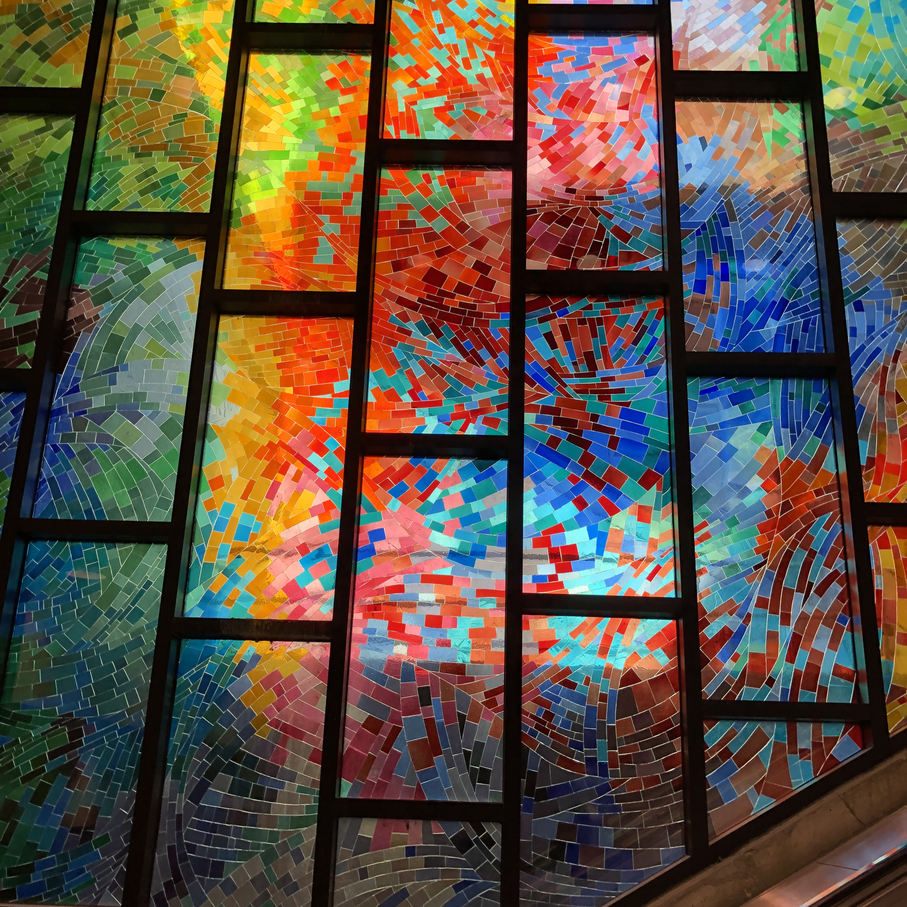
④ To embody a design or pattern − Some pictures are taken to describe some mathematical entity, or pattern. For example Fibonacci spirals in plants, perspectives of buildings, texture of bark on trees. Some of these are human-made, others natural, but design is always paramount.
A carving pattern on a Norwegian wooden chest…
…or mottled stained glass in the Montreal Metro
⑤ To interpret the manner in which humans interact with their environments − An interpretive record of a segment of human life, and activity that is interesting. This could be things like travel, sports, historical experiences, etc.
Digital cameras often provide one or more “monochrome” filters, essentially converting the colour image to grayscale (and perhaps adding some form of contrast etc.). How is this done? There are a number of ways, and each will produce a slightly different grayscale image.
All photographs are simulacra, imitations of a reality that is captured by a camera’s film or sensor, and converted to a physical representation. Take a colour photograph, and in most cases there will be some likeness between the colours shown in the picture, and the colours which occur in real life. This may not be perfect, because it is almost impossible to 100% accurately reproduce the colours of real life. Part of this has to do with each person’s intrinsic human visual system, and how it reproduces the colour in a scene. Another part has to do with the type of film/sensor used to acquire the image in the first place. But greens are green, and blues are blue.
Black-and-white images are in a realm of their own, because humans don’t visualize in achromatic terms. So what is a true grayscale equivalent of a colour image? The truth is there is no one single rendition. Though the term B&W derives from the world of achromatic films, even there there is no gold standard. Different films, and different cameras will present the same reality in different ways. There are various ways of acquiring a B&W picture. In an analog world there is film. In a digital world, one can choose a B&W film-simulation from a cameras repertoire of choices, or covert a colour image to B&W. No two cameras necessarily produce the same B&W image.
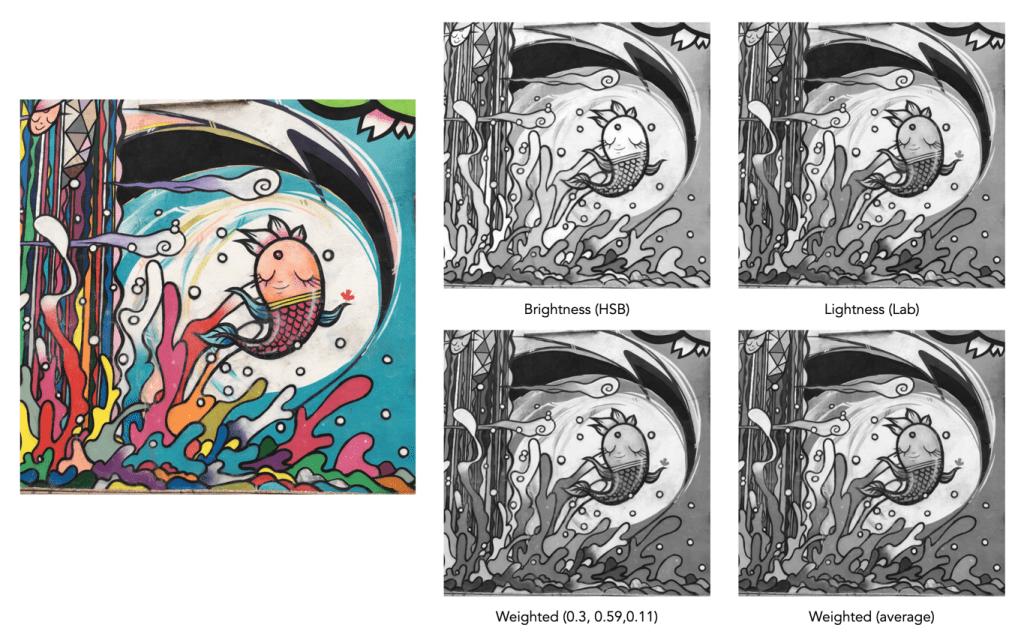
The conversion of an RGB colour image to a grayscale image involves computing the equivalent gray (or luminance) value Y, for each RGB pixel. There are many ways of converting a colour image to grayscale, and all will produce slightly different results.
Convert the colour image to the Lab colour space, and extract the Luminance channel.
Extract one of the RGB channels. The one closest is the Green channel.
Combine all three channels of the RGB colour space, using a particular weighted formula.
Convert the colour image to a colour space such as HSV or HSB, and extract the value or brightness components.
Examples of grayscale images produced using various methods – they may all seem the same, but there are actually subtle differences.
The lightness method
This averages the most prominent and least prominent colours.
Y = (max(R, G, B) + ,min(R, G, B)) / 2
The average method
The easiest way of calculating Y is by averaging the R, G, and B components.
Y = (R + G + B) / 3
Since we perceive red and green substantially brighter than blue, the resulting grayscale image will appear too dark in the red and green regions, and too light in the blue regions. A better approach is using a weighted sum of the colour components.
The weighted method
The weighted method weighs the red, green and blue according to their wavelengths. The weights most commonly used were created for encoding colour NTSC signals for analog television using the YUV colour model. The YUV color model represents the human perception of colour more closely than the standard RGB model used in computer graphics hardware. The Y component of the model provides a grayscale image:
Y = 0.299R + 0.587G + 0.114B
It is the same formula used in the conversion of RGB to YIQ, and YCbCr. According to this, red contributes approximately 30%, green 59% and blue 11%. Another common techniques is to converting RGB to a form of luminance using an equation like Rec 709 (ITU-BT.709), which is used on contemporary monitors.
Y = 0.2126R + 0.7152G + 0.0722B
Note that while it may seem strange to use encodings developed for TV signals, they are optimized for linear RGB values. In some situations however, such as sRGB, the components are nonlinear.
Colour space components
Instead of using a weighted sum, it is also possible to use the “intensity” component of an alternate colour space, such as the value from HSV, brightness from HSB, or Luminance from the Lab colour space. This again involves converting from RGB to another colour space. This is the process most commonly used when there is some form of manipulation to be performed on a colour image via its grayscale component, e.g. luminance stretching.
Huelessness and desaturation ≠ gray
An RGB image is hueless, or gray, when the RGB components of each pixel are the same, i.e. R=G=B. Technically, rather than a grayscale image, this is a hueless colour image.
One of the simplest ways of removing colour from an image is desaturation. This effectively means that a colour image is converted to a colour space such as HSB (Hue-Saturation-Brightness), where the saturation value is effectively set to zero for all pixels. This pushes the hues towards gray. Setting it to zero is the similar to extracting the brightness component of the image. In many image manipulation apps, desaturation creates an image that appears to be grayscale, but it is not (it is still stored as an RGB image with R=G=B).
Ultimately the particular monochrome filter used by a camera strongly depends on the colour being absorbed by the photosites, because they do not work in monochrome space. In addition certain camera simulation recipes for monochrome digital images manipulate the grayscale image produced in some manner, e.g. increase contrast.
ISCO was essentially an offshoot of Schneider. It was founded in 1936 with the name Jos. Schneider & Co., Optische Werke, Göttingen. The factory was constructed in Göttingen as a second production site on behalf of the Reich Ministry of Aviation. The site produced manufactured Schneider lenses, and during the war years they produced cameras for aerial reconnaissance (the Luftwaffe required fast lenses with exceptional resolution). Lenses included the high-speed Night Xenons with 125mm, 330mm, 400mm, and 500mm focal lengths. During WW2 they produced around 45,000 lenses for aerial cameras, the main supplier of the Luftwaffe.
Due to the nature of the war production, the plant was dismantled by the Allied powers at the end of the war. The company name was not allowed to be used until 1953, so the company operated under the name Optische Werke Göttingen. They initially produced lenses for cinematic projectors, with names like Kiptar and Super-Kiptar. In 1951 camera lenses were produced for the first time, initially as built-in lenses for various camera manufacturers, e.g. Apparate & Kamerabau, Balda, Bilora, Franka, Wirgin. These were triplets of 4-element lenses, such as Isconar and Westanar. From 1956 ISCO increased its designs for wide-screen projection, and included lenses for 8mm, 16mm and 35mm cine cameras.
An an example of a well known ISCO lens
The first lens for SLR cameras appeared in 1952, and was the Westar 50mm f/2.8. It was sold with Exa cameras in the US. This was followed by the Westagon 50mm f/2, and Westrocolor 50mm f/1.9. In 1958 ISCO designed the Westrogon 24mm f/4, the worlds first extreme wide-angle lens for SLR cameras, ahead of the Zeiss 20/25mm Flektogons. Lenses were produced under a number of names: Westar (50mm, 100mm), Westanar (50/85/135/150/180mm), Westagon (50mm), Westron (28/35mm), Westromat (35/135mm), Westrogon (24mm), Westrocolor (50mm), Isco-Mat (35/50/135mm), Iscotar (50mm), Isconar (50/80/100/135mm), Tele-Iscaron (135/180/400mm), Tele-Westanar (135/180mm), Isconar (90/100/135mm) and Iscorama.
With the decline of the German camera industry, the demand for SLR interchangeable lenses also decreased. ISCO shifted its production back to the field of projection lenses for film, narrow film and slides. In 2009 the name was changed to Schneider Kreuznach ISCO Division GmbH & Co. KG. The lenses now produced are full frame lens set for both anamorphic and spherical cine photography.
There are generally two camps when looking at vintage photographic gear: those interested in using vintage lenses on digital cameras, and those interested in shooting with a vintage camera. The first have little or no interest in shooting with film, the latter likely focus on it. There is also a third category – the collector, and their needs might be distinctly different from active users of vintage gear. People choose vintage SLR cameras for a number of reasons (an SLR is just one choice amongst 35mm cameras, people also opt for rangefinder cameras, or point-and-shoot). Perhaps they want to get back to basics, and use with a system that has complete manual functionality, or perhaps they are interested in experimenting with film. It could be they just like the feel and process of using a film camera, or even for nostalgic reasons. It is in many respects a much more fundamental, slow form of photography, even though it requires much more participation from the perspective of calculating the right exposure, choosing the appropriate film etc.
There are a number of choices
Vintage SLR’s come in many different forms – fully manual to some level of automation can be accommodated in some manner. For example the cameras produced in the 1950s to the mid 1960s are all-metal, and all-mechanical (manual focusing, exposure and film advance). They are often very aesthetically pleasing and have lens options which often produce artistic renderings. After this came the first auto exposure SLRs, which meant shutter-priority followed by aperture-priority. These cameras still had a lot of mechanical parts, but some of the functionality was taken over by solid-state electronics. The introduction of electronic SLRs pushed automation ever further. From the mid-1970s until the late 1980s came the electronic SLRs became the norm mostly to cut both costs and mechanical complexity. These camera bodies contain more plastic, and the first program-auto exposure settings.
SLRs are good for many photographic genres
Of course another motive focuses on the type of photography the camera is going to be used for. This is important because it allows a set minimum requirements to be established. There are some genres of photography that are better suited to the use of vintage cameras than others. General everyday or travel photography, landscapes, street or portrait photography are ideally suited to vintage cameras. This is because these genres are suited to manual focusing, and adjustment of exposure settings on the fly. Alternatively, wildlife or sports photography are not the best genres for a vintage camera (despite the plethora of telephoto lenses on the market). Both these genres generally require telephoto lenses, which with manual focusing isn’t optimal. Some people likely chose a mechanical SLR in order to experiment with street-photography at the most basic level, or an electronic SLR for travel photography.
Fig 1: Many SLRs offer a very simple tactile experience
The tactile experience is often better than with digital
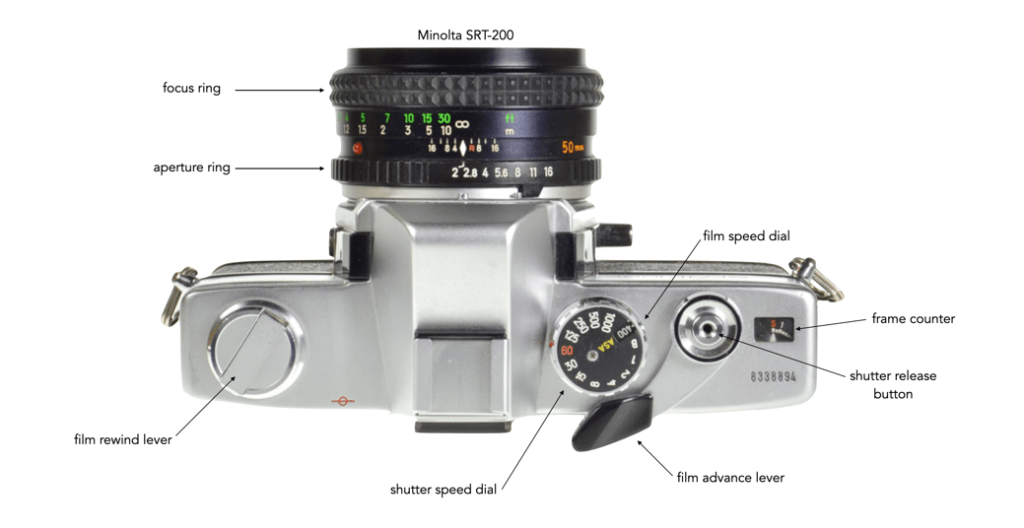
Although there are many differing forms of 35mm cameras, SLRs do stand out for their tactile experience. Early SLRs were entirely manual, meaning that there were many differing parameters which had to be manually modified in order to obtain the correct exposure. This means cameras had various lever and knobs which had to be adjusted – there is the shutter button, adjustments for film speed, shutter speed, and on the lens, aperture and focus mechanisms. There is a level of interaction which is a vastly more tactile experience than pushing a button, or setting a menu item on a digital camera.
Analog is nostalgic
Analog photography can be somewhat limiting, in that there isn’t a memory card with limitless capability to store photographs. Film will limit the number of pictures able to be taken, so every shot has to count. This amps up the level of creativity, forcing the photographer to slow down, observe the surrounding world, and think about the picture being taken. Choosing a vintage 35mm SLR, or even a rangefinder for that matter, means embarking on a more participatory experience, where the level of self expressiveness is determined by the complexity of the camera itself. The physical nature of film – loading it, winding it on, hearing the shutter open and close – combine to provide a more natural [pure] experience.
Fig 2: Price points (Cad$) of various SLRs (in good+ condition)
SLRs are available at a good price
Vintage SLRs are available at many different price ranges. Yes there are expensive SLRs – usually this has to do with scarceness. For example someone might be interested in a 1936 Exakta Kine 35mm SLR, the first SLR, which could be worth anywhere from C$3000-4000. Or perhaps an ALPA camera, which are generally upwards of C$1200. But there are plenty of relatively inexpensive cameras, partially because there were so many manufacturers in the 1960s, and so many cameras were produced. You can find an Olympus, Pentax, or Minolta camera (body only) for between C$300 and C$500 (certified/restored). Less well-known brands of the period are even cheaper, e.g. Konica, Petri, Ricoh, Yashica, Miranda, Fujica etc, often including a 50mm lens.
SLRs are well built
Before the more extensive use of plastics in the 1970s, metal was king. Many cameras up until this period (and even beyond) used a die-cast metal body, which means the cameras were built tough.
SLRs are educational
One of the issues with digital cameras is that so much is automated. That’s not a bad thing in a lot of situations because it allows you to concentrate on framing the shot. However because of this, the inner workings of the camera are sometimes lost to the photographer. An SLR will also help the novice learn the fundamentals of photography – the hard way. This means you have to gain a more intimate understanding of how things like shutter speeds, apertures, and exposure works. However on the flip-side you do gain better control of the photographic process.
This FAQ deals more with the “tech” side of things. Vintage cameras are mostly mechanical, i.e. they are filled with gears and doohickeys of all sorts.
How complex are vintage cameras?
Quite complex, at least from a mechanical perspective. The earlier rangefinders may have been somewhat less complex, but as cameras attained more features, the mechanical complexity increased. They are a world away from the early plate cameras with very moving parts. In some respects electronically controlled cameras can often have simpler designs.
Which brands are most dependable?
This is really hard to pinpoint. You really have to go off reliability, popularity, and reviews. Every manufacturer created good SLRs, and ones that were less that stellar. The less dependable cameras are often those that have known mechanical issues, obscure mechanisms (e.g. “new” shutter mechanisms, or materials that just didn’t work), or have poor usability. If this question is asked on some forum, everyone will have a different answer.
Which brands to avoid?
I don’t like to pigeonhole brands, but for the novice I would honestly avoid East German and Russian SLRs. There should be a lot of these cameras, but in reality there often aren’t, perhaps because they haven’t stood the test of time. The exception is the manual Ihagee Exakta cameras, which generally are quite good from a mechanical viewpoint.
What’s the most important technical issue with vintage cameras?
Arguably the most critical things have to do with the shutter. Shutters are generally constructed of light-tight cloth, metal, or plastic curtains, all of which can be damaged. Does the shutter actually work properly on all shutter speeds, i.e. does it open and close, and not get hung up somewhere? In some cameras the shutter will work fine for fast speeds and perhaps get hung up on one or two of the slower speeds. You can usually test this by opening up the back of the camera and checking the shutter at each speed setting. More critical may be whether or not the shutter speeds are accurate. Again some may be, others may not be.
Are batteries an issue?
There are vintage cameras that use batteries, mostly those that use meters of some sort, or contain electronics. Some vintage cameras use Mercury-oxide batteries which are a problem, because sometimes can’t often be satisfactorily replaced (they were banned in the late 1990s). Also, sometimes even when you find a battery, aging electronics can lead to issues. I have a Minolta X11 (specified to use S76 1.5V “silver-oxide” batteries) which works well, except for one thing – the batteries drain really quickly. This was a quick fix though, only add the batteries when the camera is actually being used.
Are SLR cameras repairable?
Yes, but these days it is sometimes hard to find people that fix them, and it can be expensive. Some repair specialists just remedy specific camera brands. It is also an issue of how readily parts are available – if you have a camera where a lot were made, (say 500,000) it is obviously easier to find donor cameras to provide parts than it is a vintage camera where very few were made. A film camera CLA (Clean, Lube, Adjust) can cost anywhere from C$150-300. In some cases it may be preferable to pay more for a certified camera rather than go through the hassle of repairing an inexpensive one.
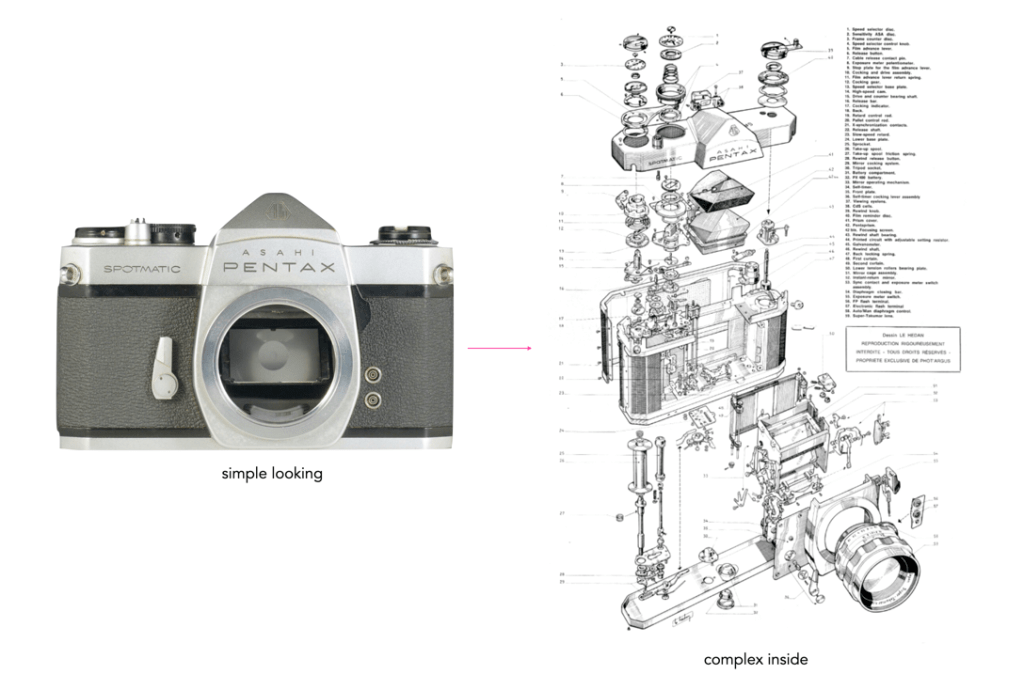
Manual cameras are pretty complex inside (Asahi Spotmatic, 1964)
Can I fix a camera myself?
Hmmm… yes and no. Let me put it into context. If a camera is cheap you could try and fix it, depending of course on the complexity of the issue. To do this, you need to have the right tools, and probably a camera manual. The problem is that sometimes the sheer age (50-80 years) can mean things are seized up, and un-seizing can sometimes lead to things breaking. I would honestly not go down that path (having tried fixing something simple, it just broke something else). It takes a lot of patience and quite a bit of knowledge to pull things apart and put them back together in working order. Even manual cameras are complex – the innards are a haven of interwoven mechanical things. Open a camera at your own peril.
Are light meters an issue?
Invariably yes. Some of the meters, like the early selenium meters can often work quite well, whereas the Cadmium Sulfide (CdS) meters may not work as well. Sometimes cameras will be advertised as “meter not functioning”. Sometimes due to age, the light meter may not be that accurate anyway, so it might be best to use an external light meter, or even a digital one.
Are there issues with electronic 35mm SLRs?
Yes, electronics don’t always stand the test of time well. Electronics tend to be adverse towards moisture, and dust, which will find their way into a camera and cause issues. It may be possible to find (or even manufacture) mechanical part replacements, electronics are another thing altogether. That being said, electronic cameras are usually quite reliable.
A lot of photographic inspiration often comes from nature. Last week I was walking in a park a few hours after the torrential “100 year storm”, and noticed that all the twigs lying on the ground had been washed down the grassy hill, forming these clumps of miniature log-jams. They were just a lot of fun from a artistic viewpoint, showing again that nature truly knows how to do randomized, chaotic art.
It’s funny when someone says a photograph is beautiful, because not everyone will have the same perception. This is because the idea of beauty is a very subjective one. Beauty is a term which cannot truly be quantified in any real manner. What society has done is imprint certain standards of beauty based on a few peoples opinions. If you look at the picture of the pink flower below, you might say it’s beautiful – but why is it beautiful? Is it because most people would say that, or is it because it is colourful. A brown flower would likely be considered not-so-beautiful. Is it because the flower smells nice? (which obviously you cannot tell from a photograph). The second flower below, a Frangipani is simpler, but may be beautiful because of its decadently sweet, floral, fragrance. Could beauty be an amalgam of visual and olfactory senses?
Are pink roses considered more beautiful?
This Frangipaniflower is plain, but still beautiful.
For most of human existence, beauty has not really mattered that much (well, except maybe for those who had wealth, I mean gold is shiny, which likely contributes to its allure). Most humans were concerned with survival. That is not to say that aesthetics did not play a role in the things they made, but let’s face it, catching food took precedence over making things look pretty. Beauty may have existed more in the natural world. In fact it may be these natural patterns that exist in nature that has lead to humans being somewhat hardwired to experience beauty.
“Beauty is no quality in things themselves: It exists merely in the mind which contemplates them; and each mind perceives a different beauty. One person may even perceive deformity, where another is sensible of beauty; and every individual ought to acquiesce in his own sentiment, without pretending to regulate those of others.”
Hume, David, “Of the Standard of Taste”, Essays Moral and Political, p.136 (1757)
Beauty has to do with the idea of aesthetics, which is essentially the appreciation of beauty. The term “aesthetics” was introduced in 1750 by German philosopher Alexander Gottlieb Baumgarten who defined taste, in its wider meaning, as the ability to judge according to the senses, instead of according to the intellect. When we say something is beautiful, we are expressing an aesthetic judgment. When you pick a raspberry from a bush, you tend to choose the bright red, firm raspberries, with no apparent visual defects, those that are most beautiful (of course these is nothing to say they will taste good from pure visual assessment alone).
Is there not beauty in the piped twist of a French crullers?
The beauty in a matcha latte lies in the contrast between the green of the matcha and the foamy heart.
Beauty can be objective and universal, as certain things are beautiful to everyone. Perhaps flowers are a good example, or things in the natural world. However beauty in the human-made world is more subjective and individual. It is no different with our other senses. A delicious food to some, may taste repugnant to others. Another good example is art. Some people can find a piece of art beautiful, while others find it loathsome. Beauty truly is in the eye of the beholder. Each person’s perception of beauty is also influenced by their environment. In 1951 artist Robert Rauschenberg produced White Painting, basically white latex house paint applied with a roller and brush on two canvas panels. Some will find beauty in this nothingness, many won’t (well because there is nothing there).
The same is true of photographs, where beauty truly is subjective, mainly because photographs inherently represent the visual perspectives of the photographer, not necessarily those of the viewer. In some cases what is viewed in a photograph may not have the same beauty as the scene in real life, perhaps due to the lack of depth (i.e. flatness), or the misinterpretation of colour. In other cases, the photograph tells a different story of beauty to the real world. For instance colour may not be quintessential to beauty. The absence of colour in B&W images is not to everyone’s taste, yet it helps to tell a story in a way that means the colour does not distract the viewer from the image’s inner beauty, perhaps highlighting the expressions and textures of the scene.
There are many elements to producing a beautiful photograph, but at the end of the day, beauty is very much tied to the perceptions of the viewer. And unlike the physical world where we can harness all out senses to decipher our understanding of beauty, in visual media we have only our eyes.
When it comes to “who invented what first” in the photographic industry, there is always a lot of discussion when it comes to German patents. For example the idea that the Contax S had the first pentaprism for 35mm SLRs is based on a early patent. But just because a patent existed somewhere didn’t mean that similar technology wasn’t being developed elsewhere in parallel. And concepts don’t always make it to reality.
During the Second World War, German companies often applied for patents in other European countries, such as France and Switzerland. France made somewhat sense, considering it was mostly occupied by Germany during the war. Why this was done is still up for debate, but the end result is that there are often patents for photographic objects which exist outside Germany, but no longer have an associated German patent (for whatever reason). For example, information on the the precursor to the Spiegel-Contax (Contax S) camera, the Syntax, which was designed during the war, is available by means of a French patent FR884054 filed on August 9, 1941. The patent is supposedly based on a German utility patent filed on August 23, 1940, however a search of German patents finds nothing. Is that because it never existed, was never processed, or was lost? (The non-German patents normally identify that they are based on a German patent, however no German patent numbers are provided). It was also possible that during a war economy, only inventions that were important to the war effort were granted, many as so-called “secret” patents.
A patent is only effective within the scope of the respective patent law. Companies therefore register patents abroad in order to protect their inventions there from unauthorized imitation. In most cases during the war, these patents were confiscated. For example with the “Patents, Designs, Copyright and Trade Marks (Emergency) Act, 1939” of September 21, 1939, the British began confiscating enemy patents. Other Allied countries undoubtedly enacted similar laws.
The fate of German patents in the period 1945-1950 is somewhat interesting. According to the German Patent and Trademark Office, in 1944 due to the bombings, large portions of the patent office in Berlin (some 250-320K volumes were moved to the town of Heringen, and stored in a 500m deep potash mine shaft. The town was occupied by U.S. troops on 3 April 1945, and the shaft was located, although the patents were not exactly in great shape, and likely would have disintegrated if brought to the surface. So a team was sent down the mineshaft to microfiche the patents. Other patents were dispersed throughout Germany, and supposedly one set of copies of 180,000 patent applications were taken into eastern Germany where they were later lost by fire. Now the U.S. were actively engaged in tracking down secret documents from the industrial and research community. This involved 17 U.S. industries, and hundreds of civilian investigators. They discovered vacuum tubes made of heavy porcelain, magnetophone tape, and infrared technologies.
Starting in July 1945, U.S. troops seized some 145,000 “non-concluded” patent files. Essentially nearly all the German patents ended up in West Germany, meaning that the companies in East Germany likely no longer had access to the protection of these patents. Quite a number of the patents seized were used to help industries in allied countries. Why were not more photographic patents used? The allied countries really didn’t have the same level of photographic industry as Germany. Most German camera/lens companies actually ended up in the Soviet occupation zone. In addition, it is likely the main company in the Western zone, Leitz, had enough pull to allow it to continue operating.
In addition, from the end of April 1945 until 1 October 1948 there was no facility to file patents, aka the “patent-office-free-period” when no patents could be filed. Germans in the western zones were able to file patents again on 1 October 1948 and the German Patent Office began operations on 1 October 1949. In East Germany, patents could be submitted again on 15 September 1948, and on 6 September 1950, the Office for Inventions and Patents of the GDR was established.
What about the old patents which had basically been neutralized? Well in West Germany, the provisions on the maintenance of old IP rights were covered by the “First Act on the Amendment and Transition of the Provisions in the Field of Industrial Property Protection” of 8 July 1949. A request to maintain the IP rights had to be filed by 30 September 1950. A similar act appeared in East Germany in 1950. An example is one of Zeiss’s patents for pentaprisms from 15.4.1942: “Z 679 IXa/42 h ‘Spiegelprisma mit konstanter Ablenkung’ ” – basically a version of the 1946 Swiss patent, CH241034. It was reapproved on 14 June, 1951 (DE000Z0000679MAZ). Note that the 1942 patent does not appear in the German Patent Office searchable database.
It is therefore possible to find some patents, but others were likely lost in the attempt to save them during the tail end of the war. So the idea of defining who invented something first during the 1940s in Europe, but in particular Germany is very challenging, as noted in my post on Who had the first 35mm SLR with a pentaprism? Having said that it is generally easy to find historic patents from countries like Germany, Switzerland, and France. It is much harder to find them from Italy, or even Belgium.














 Crafting Pixels