The 1950s heralded the golden age of travel photography. There was an abundance of camera options due initially to the emergence of East Germany as a powerhouse of inexpensive 35mm cameras, followed shortly afterwards by Japan, but also non-SLR cameras – and the travel revolution had begun. That’s not to say film was necessarily cheap – in 1955 you could buy three rolls of 20 exp. 35mm Kodachrome for about US$5.50 (usually this cheaper price was without processing). To put this into context, a loaf of bread was about US$0.12. Yet when people travelled, for example to Europe, the average length of a trip was about 50 days, at a cost of $1300 (1950), so in all likelihood for those who could afford it, film was a minor expense.
Anyone who knows someone who was an amateur photographer during the heyday of 35mm knows that they often took a lot of photos when travelling. Photos of people, photos of places, and things they saw along the way. Some turned out, others not so much. Why? Because you may never be able to retake a given situation, and because the situation of the travel photographer usually finds themselves in – a very limited time to shoot. You may never come back to the same place (and regardless it will have changed). However travel photography was still limited for the amateur photographer due to inexperience – this often resulted in photos that were out-of-focus, or had parts cut off (maybe sometimes made worse by camera manufacturers who made automatic cameras seem flawless). You never knew exactly what you were going to get until the film had been processed.
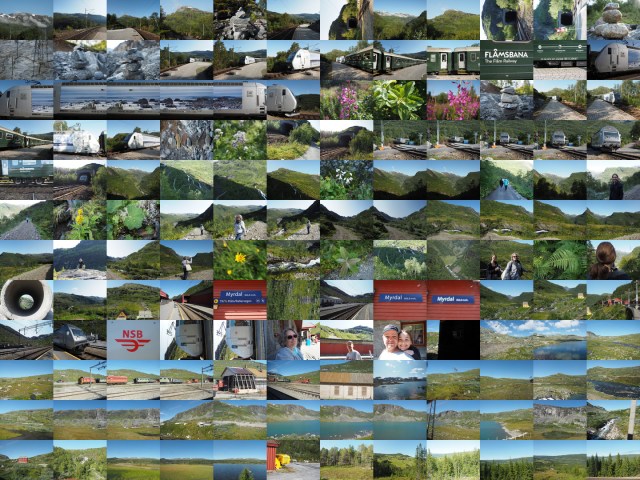
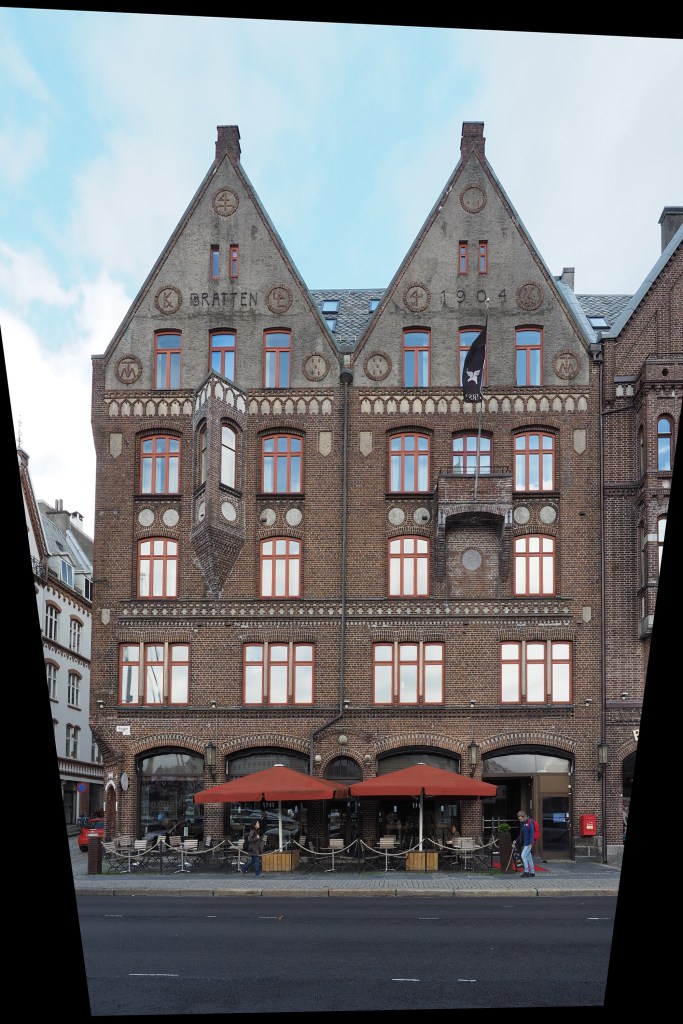
On a trip to Norway I took some 2000 pictures with iPhone and Olympus camera combined (and sometimes I still can’t find that elusive photo I never took).
With digital photography we have another dilemma – you can take hundreds (or even thousands) of photographs, because it is possible. There is no material limit beyond the capacity of a memory card, and that can easily be augmented with other cards. With the proliferation of intelligent cameras, the amateur photographer can focus more on content, and perhaps a little less on the technicalities of taking a photo. Travel photography has become a “shoot now, discard later” venture. But is quantity bad? This may be less about producing a safety net of good photographs, and more about shooting all you want to.
Well known Japanese street photographer Daido Moriyama is the type of photographer that has always believed that quality only comes with quantity. He is known to take 36 exposures in less than 100m of street photography.
“As I’ve said countless times before, my photography is all about quantity. I take lots of shots. Digital cameras are just so amazingly convenient. There’s no film to keep changing, and you just point the camera where you like… Of course, the batteries are a bit of a bother, but relatively speaking…”
Moriyama, How I Take Photographs (2019, p.78)
In the glory days of film, professional photographers would take roll after roll of film, from which only five or ten shots may be used to complete a story. This wasn’t really possible for the amateur film photographer, due to inexperience, cost, and equipment limitations. With digital many of these limitations have disappeared. For some people it is sometimes hard to take a large number of photographs. Sometimes it just doesn’t feel right, but things change over time when you realize that the photo you are looking for was one you never shot. Shooting copious frames in digital costs nothing from a storage perspective. Sometimes it is just finding the balance between quantity and art.
Many people buy a camera for taking photographs when travelling. Yeah sure, you could use a smartphone, but it won’t provide you with the flexibility of a real camera. Really. Smartphones are restricted to having small sensors (with tiny photosites), a low-power flash, and uber-poor battery life. While they have improved in recent years, offering quite incredible technology inside their limited form factor, they will never replace dedicated cameras. Conversely, you don’t have to carry around a huge DSLR sporting a cumbersome 28-400 zoom lens.
There are so many posts out there which are titled something like “best travel camera 2022”, it’s almost overwhelming. Many of the cameras reviewed in these posts have never really been tested in any sort of real setting (if at all). So below I’m going to outline some of the more important things to consider when choosing a travel camera? Note that this is a list of things to think about, not a definitive and in-depth interpretation of requirements for cameras used for taking travel photos. Note that this discussion related to digital – choosing a good analog cameras for travel is another thing altogether.
What will you be snapping? − buildings? people? close-up shots of flowers?
① Budget − Of course how much you want to spend is a real issue. Good cameras aren’t cheap, but spending a reasonable amount on a camera means that it should last you years. You want a good balance of the items described below. If your budget is limited, go for a compact camera of some sort.
② Compactness − The first choice from the camera perspective may be whether you want something that will fit in a pocket, a small bag (e.g. mirrorless), or a complete camera backpack (e.g. full-frame, which I would avoid). For a compact, you could go with one that has a zoom, but honestly a fixed focal length works extremely well. Good examples include the Ricoh GRIII (24.3MP, 18.3mm (28mm equiv.) f/2 lens) and Fujifilm X100V (26.1MP, 23mm (35mm equiv.) f/2 lens, 4K video). Because of their size, compacts sometimes have to sacrifice one feature for another. You also don’t want a compact that has too many dials – their real benefit is being able to point-and-shoot.
Mirrorless cameras are smaller than full-frame cameras because they don’t need to fit a mirror inside – they use a digital viewfinder instead of an optical one. They have a compact size, and provide good image quality. The downside is that they generally have smaller sensors, like APS-C and MFT. I normally opt for both a compact pocket camera, and a mirrorless. Some are better suited to some situations, e.g. compact cameras are much less conspicuous in indoor environs, and places like subways – that’s why they are so good for street photography. More compactness = enhanced portability.
③ Resilience − When you travel, there is often very little time to worry about whether or not a camera is going to get banged up. Cameras made of metal are obviously somewhat heavier, but offer much better survivability if a camer is accidentally dropped, or banged against something. A camera constructed with a body made of magnesium alloy is both durable and lightweight. It is both corrosion resistant and can handle extremes in temperature well. A magnesium alloy body has less chance of cracking as opposed to a polycarbonate body.
④ Weather resistance − You can never predict weather, anywhere. Some places are rainy or drizzly, others environs are dry and may have particles of stuff blowing in the air. Obviously you’re not going to take photos in pouring rain, but dust and dirt are often a bigger concern. My Ricoh GRIII is not weather sealed, which seems somewhat crazy when you consider it is a street camera, but there are always tradeoffs that have to be considered. In the case of the GRIII, adding weather sealing would have resulted in less flexibility on lens barrel construction, button/dial layout, and heat dissipation. My Fuji X-H1 on the other hand is weather resistent. Of course you should also choose lenses which are weather resistent. If weather resistance is important, be sure to read up on the specifics for a camera. For example the Fuji X100V is deemed to be weather-sealed, but the lens is not. To achieve this you have to buy an adapter, and add a filter.
⑤ Weight − How much are you willing to lug about on a daily basis when travelling? You don’t want to choose a camera that is going to give you back or shoulder pain. Larger format cameras like full-frame are heavier, and have heavier, larger lenses. If choosing a camera with interchangeable lenses, you also have to consider their weight, and the weight of batteries, and anything else you want to carry. There are even differences between compact cameras, e.g. the GRIII is 257g, versus the X100V at 478g, 85% more.
⑥ Lenses − If you choose an interchangeable lens camera, then the next thing to do is choose some lenses… a topic which deserves numerous posts on its own. The question is what will you be photographing? In general it is easy to narrow the scope of lenses which are good for travelling because some just aren’t practical. Telephoto for example – there are few cases where one will need a telephoto when travelling, unless the scope of the travelling involves nature photography. Same with macro lenses, and fisheye lenses (which really aren’t practical at the best of times). In an ideal world the most practical lenses are in the 24-35mm (full-frame equivalent) range. I think prime lenses are best, but short-range zooms work quite well too. I would avoid long-range zooms, because you will always use the smaller focal lengths, and long-range zooms are heavy.
⑦ Batteries − Camera batteries should have a reasonably good use-time. Using camera features, and taking lots of photos will generally have an impact on battery life. For example using image stabilization a lot, being connected to wi-fi, or turning the camera on and off a lot will run down the battery. There are other things to consider as well. For example most batteries run down quicker in colder environs. Full-frame cameras are bigger, and therefore have a longer battery life than cropped-sensor cameras. Also determine if the camera just comes charging in-camera, you will likely need to buy an external charger. Some battery chargers are also slow. Ideally always carry extra batteries no matter what the manufacturer claims.
⑧ Use − What is the camera’s main use during travelling? Street-photography? Vlogging? Landscapes (for poster-sized prints)? Or perhaps just simple travel snapshots. If the latter, then a compact will work superbly. If you want to have the flexibility of different lenses, then a mirrorless camera makes the most sense.
⑨ Video − Do you plan to take videos on the trip? If yes, then what sort of capabilities are you looking for? Most cameras produce video in HD1080p, and some have 4K capability. Some cameras limit the length of a video. If you plan to use the camera mostly for video, choose one specced out for that purpose.
⑩ Stabilization − Many cameras now offer some form of image stabilization, which basically means that the camera compensates for rudimentary camera shake due to hand-holding the camera, and keeping the camera steady in low-light situations. This is more important for travel photography because it is cumbersome to lug around a tripod, and many places, like the Arche de Triumph won’t allow the use of tripods. Some compacts like the Ricoh RGIII do have stabilization, whereas others like the Fuji X100V do not.
The best way of choosing a camera is to first make a list of all the things you want from the camera. Then try and find some cameras which match those specifications. Then see how those cameras stack up against the considerations outlined above. Narrow down the list. When you have about three candidates, start looking at reviews.
I tend to stay away from the generic “big-box” style reviews of cameras, especially those who use the term “best of YEAR” in the title. I instead pivot towards bloggers who write gear reviews – they often own, have rented, or are loaned the cameras, and offer an exceptional insight into a cameras pros and cons, and provide actual photographs. Usually you can find bloggers that specialize in specific types of photography, e.g. street, travel, video. For example, for the Ricoh GRIII, here are some blog reviews worth considering (if anything they provide insight into what to look for in a review):
5050 Travelog – A travel blog which offers camera and lens reviews. (lots of Fuji)
Lastly, don’t worry about what professional photographers carry when travelling. Chances are they are on assignment, and carry an array of cameras and related equipment.
REALITY: In reality there is no such thing as bad light, or bad weather, unless it is pouring. You can never guarantee what the weather will be like anywhere, and if you are travelling to places like Scotland, Iceland, or Norway the weather can change on the flip of a coin. There can be a lot of drizzle, or fog. You have to learn to make the most the situation, exploiting any kind of light.
MYTH 14: Manual exposure produces the best images.
REALITY: Many photographers use aperture-priority, or the oft-lauded P-mode. If you think something will be over- or under-exposed, then use exposure-bracketing. Modern cameras have a lot of technology to deal with taking optimal photographs, so don’t feel bad about using it.
MYTH 15: The fancy camera features are cool.
REALITY: No, they aren’t. Sure, try the built-in filters. They may be fun for a bit, but filters can always be added later. If you want to add filters, try posting to Instagram. For example, high-resolution mode is somewhat fun to play with, but it will eat battery life.
MYTH 16: One camera is enough.
REALITY: I never travel with less than two cameras, a primary, and a secondary, smaller camera, one that fits inside a jacket pocket easily (in my case a Ricoh GR III). There are risks when you are somewhere on vacation and your main camera stops working for some reason. A backup is always great to have, both for breakdowns, lack of batteries, or just for shooting in places where you don’t want to drag a bigger camera along, or would prefer a more inconspicuous photographic experience, e.g. museums, art galleries.
MYTH 17: More megapixels are better.
REALITY: I think optimally, anything from 16-26 megapixels is good. You don’t need 50MP unless you are going to print large posters, and 12MP likely is not enough these days.
MYTH 18: Shooting in RAW is the best.
REALITY: Probably, but here’s the thing, for the amateur, do you want to spend a lot of time post-processing photos? Maybe not? Setting the camera to JPEG+RAW is the best of both worlds. There is the issue of JPEG editing being destructive and RAW not.
MYTH 19: Backpacks offer the best way of carrying equipment.
REALITY: This may be true getting equipment from A to B, but schlepping a backpack loaded with equipment around every day during the summer can be brutal. No matter the type, backpacks + hot weather = a sweaty back. They also make you stand out, just as much as a FF camera with a 300mm lens. Opt instead for a camera sling, such as one from Peak Design. It has a much lower form factor and with a non-FF camera offers enough space for the camera, an extra lens, and a few batteries and memory cards. I’m usually able to shove in the secondary camera as well. They make you seem much more incognito as well.
MYTH 20: Carrying a film-camera is cumbersome.
REALITY: Film has made a resurgence, and although I might not carry one of my Exakta cameras, I might throw a half-frame camera in my pack. On a 36-roll film, this gives me 72 shots. The film camera allows me to experiment a little, but not at the expense of missing a shot.
MYTH 21: Travel photos will be as good as those in photo books.
REALITY: Sadly not. You might be able to get some good shots, but the reality is those shots in coffee-table photo books, and on TV shows are done with much more time than the average person has on location, and with the use of specialized equipment like drones. You can get some awesome imagery with drones, especially for video, because they can get perspectives that a person on the ground just can’t. If you spend an hour at a place you will have to deal with the weather that exists – someone who spends 2-3 days can wait for optimal conditions.
MYTH 22: If you wait long enough, it will be less busy.
REALITY: Some places are always busy, especially so it if is a popular landmark. The reality is short of getting up at the crack of dawn, it may be impossible to get a perfect picture. A good example is Piazza San Marco in Venice… some people get a lucky shot in after a torrential downpour, or some similar event that clears the streets, but the best time is just after sunrise, otherwise it is swamped with tourists. Try taking pictures of lesser known things instead of waiting for the perfect moment.
MYTH 23: Unwanted objects can be removed in post-processing.
REALITY: Sometimes popular places are full of tourists… like they are everywhere. In the past it was impossible to remove unwanted objects, you just had to come back at a quieter time. Now there are numerous forms of post-processing software like Cleanup-pictures that will remove things from a picture. A word of warning though, this type of software may not always work perfectly.
MYTH 24: Drones are great for photography.
REALITY: It’s true, drones make for some exceptional photographs, and video footage. You can actually produce aerial photos of scenes like the best professional photographers, from likely the best vantage points. However there are a number of caveats. Firstly, travel drones have to be a reasonable size to actually be lugged about from place to place. This may limit the size of the sensor in the camera, and also the size of the battery. Is the drone able to hover perfectly still? If not, you could end up with somewhat blurry images. Flight time on drones is usually 20-30 minutes, so extra batteries are a requirement for travel. The biggest caveat of course is where you can fly drones. For example in the UK, non-commercial drone use is permitted, however there are no-fly zones, and permission is needed to fly over World heritage sites such as Stonehenge. In Italy a license isn’t required, but drones can’t be used over beaches, towns or near airports.
Travel snaps have been around since the dawn of photography. Their film heyday was likely the 1950s-1970s when photographs taken using slide film were extremely popular. Of course in the days of film it was hard to know what your holiday snaps would look like until they were processed. The benefit of analog was of course that most cameras offered similar functionality, with the aesthetic provided by the type of film used. While there were many differing lenses available, most cameras came with a stock 50mm lens, and most people travelled with a 50mm lens, possibly a wider lens for landscapes, and later zoom lenses.
With digital photography things got easier, but only in the sense of being able to see what you photograph immediately. Modern photography is a two-edged sword. On one side there are a lot more choices, in both cameras, and lenses, and on the other side digital cameras have a lot more dependencies, e.g. memory cards, batteries etc., and aesthetic considerations, e.g. colour rendition. Below are some of myths associated with travel photography, in no particular order, taken from my own experiences travelling as an amateur photographer. I generally travel with one main camera, either an Olympus MFT, or Fuji X-series APS-C, and a secondary camera, which is now a Ricoh GR III.
The photographs above illustrate three of the issues with travel photography – haze, hard shadows, and shooting photographs from a moving train.
MYTH 1: Sunny days are the best for taking photographs.
REALITY: A sunny or partially cloudy day is not always congenial to good outdoor photographs. It can produce a lot of glare, and scenes with hard shadows. On hot sunny days landscape shots can also suffer from haze. Direct sunlight in the middle of the day often produces the harshest of light. This can mean that shadows become extremely dark, and highlights become washed out. In reality you have to make the most of whatever lighting conditions you have available. There are a bunch of things to try when faced with midday light, such as using the “Sunny 16” rule, and using a neutral density (ND) filter.
MYTH 2: Full-frame cameras are the best for taking travel photography
REALITY: Whenever I travel I always see people with full-frame (FF) cameras sporting *huge* lenses. I wonder if they are wildlife or sports photographers? In reality it’s not necessary to travel with a FF camera. They are much larger, and much heavy than APS-C or MFT systems. Although they produce exceptional photographs, I can’t imagine lugging a FF camera and accessories around for days at a time.
MYTH 3: It’s best to travel with a bunch of differing lenses.
REALITY: No. Pick the one or two lenses you know you are going to use. I travelled a couple of times with an extra super-wide, or telephoto lens in the pack, but the reality is that they were never used. Figure out what you plan to photograph, and pack accordingly. A quality zoom lens is always good because it provides the variability of differing focal lengths in one lens, however fixed focal length lenses often produce a better photograph. I would imagine a 50mm equivalent is a good place to start (25mm MFT, 35mm APS-C).
MYTH 4: The AUTO setting produces the best photographs.
REALITY: The AUTO setting does not guarantee a good photograph, and neither does M (manual). Ideally shooting in P (program) mode probably gives the most sense of flexibility. But there is nothing wrong with using AUTO, or even preset settings for particular circumstances.
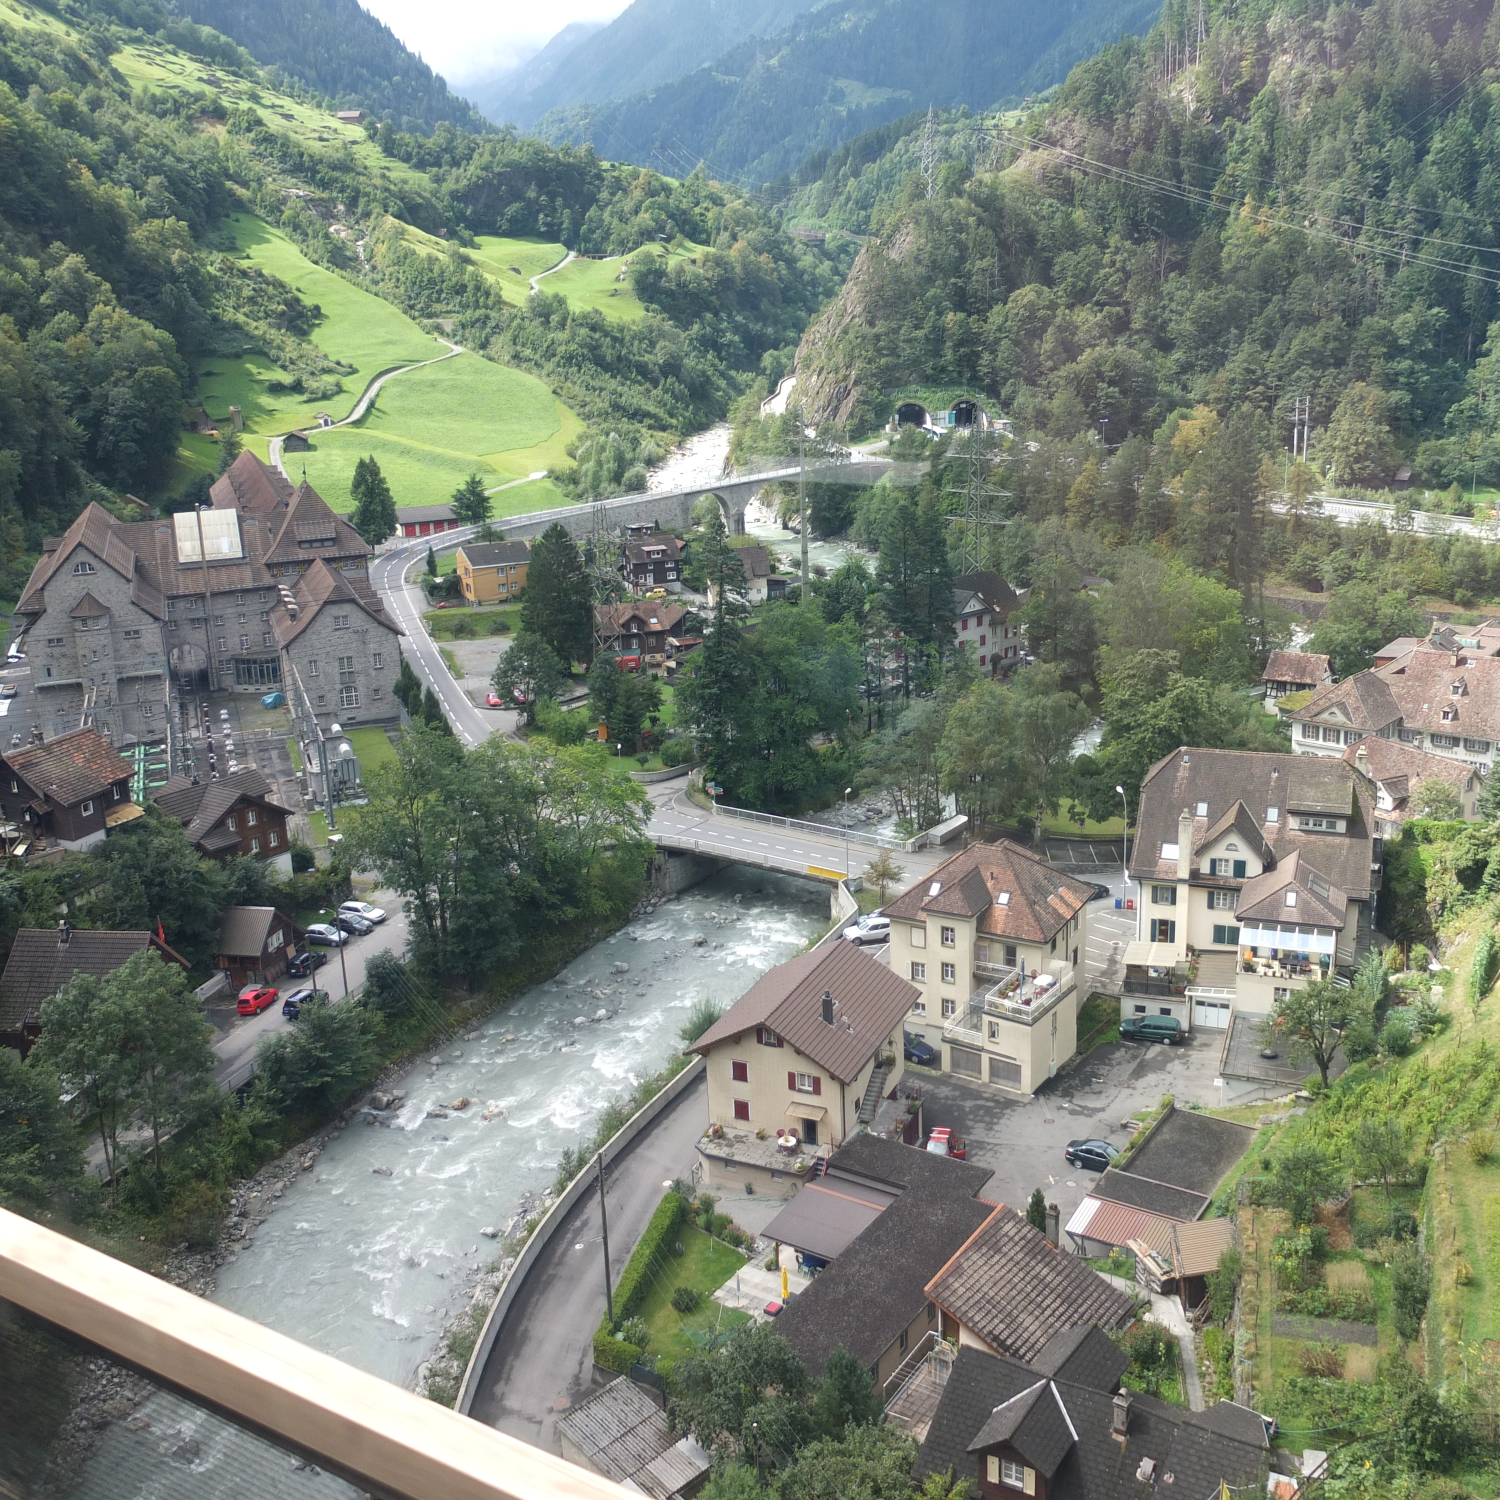
MYTH 5: Train journeys are a great place to shoot photographs.
REALITY: Shooting photographs from a moving object, e.g. a train requires the use of S (shutter priority). You may not get good results from a mobile device, because they are not designed for that. Even using the right settings, photographs from a train may not always seem that great unless the scenery allows for a perspective shot, rather than just a linear shot out of the window, e.g. you are looking down into valleys etc. There is issues like glare, and dirty windows to contend with.
MYTH 6: A flash is a necessary piece of equipment.
REALITY: Not really for travelling. There are situations you could use it, like indoors, but usually indoor photos are in places like art galleries and museums who don’t take kindly to flash photography, and frankly it isn’t needed. If you have some basic knowledge it is easy to take indoor photographs with the light available. Even better this is where mobile devices tend to shine, as they often have exceptional low-light capabilities. Using a flash for landscapes is useless… but I have seen people do it.
MYTH 7: Mobile devices are the best for travel photography.
REALITY: While they are certainly compact and do produce some exceptional photographs, they are not always the best for travelling. Mobile devices with high-end optics excel at certain things, like taking inconspicuous photographs, or in low-light indoors etc. However to get the most optimal landscapes, a camera will always do a better job, mainly because it is easier to change settings, and the optics are clearly better.
MYTH 8: Shooting 1000 photographs a day is the best approach.
REALITY: Memory is cheap, so yes you could shoot 1000 frames a day, but is it the best approach? You may as well strap a Go-Pro to your head and video tape everything. At the end of a 10-day vacation you could have 10,000 photos, which is crazy. Try instead to limit yourself to 100-150 photos a day, which is like 3-4 36 exposure rolls of film. Some people suggest less, but then you might later regret not taking a photo. There is something about limiting the amount of photos you take and instead concentrate on taking creative shots.
MYTH 9: A tripod is essential.
REALITY: No, its not. They are cumbersome, and sometimes heavy, and the reality is that in some places, e.g. atop the Arc de Triomphe, you can’t use a tripod. Try walking around the whole day in a city like Zurich during the summer, lugging a bunch of camera gear, *and* a tripod. For a good compromise, consider packing a pocket tripod such as the Manfrotto PIXI. In reality cameras have such good stabilization these days that in most situations you don’t need a tripod.
MYTH 10: A better camera will take better pictures.
REALITY: Unlikely. I would love to have a Leica DLSR. Would it produce better photographs? Maybe, but the reality is that taking photographs is as much about the skill of the photographer than the quality of the camera. Contemporary cameras have so much technology in them, learn to understand it, and better your skills before thinking about upgrading a camera. There will always be new cameras, but it’s hard to warrant buying one.
MYTH 11: A single battery is fine.
REALITY: Never travel with less than two batteries. Cameras use a lot of juice, because features like image stabilization, and auto-focus aren’t free. I travel with at least 3 batteries for whatever camera I take. Mark them as A, B, and C, and use them in sequence. If the battery in the camera is C, then you know A and B need to be recharged, which can be done at night. There is nothing worse than running out of batteries half-way through the day.
MYTH 12: Post-processing will fix any photos.
REALITY: Not so, ever heard of the expression garbage-in, garbage-out? Some photographs are hard to fix, because not enough effort was taken when they were taken. If you take a photograph of a landscape with a hazy sky, it may be impossible to post-process it.
There are some images which contain shafts of light. Sometimes this light helps highlight certain objects in the photograph, be it as hard light or soft light. Consider the following photo of a viking carving from the Viking Ship Museum in Oslo. There are some nice shadows caused by the light streaming in from the right side of the scene. One way to reduce the effects of light is to convert the photograph to black-and-white.
Before
After
By suppressing the role colour plays in the image, the eyes become more fixated on the fine details, and less on the light and shadows.
4︎⃣ Improving on sharpness
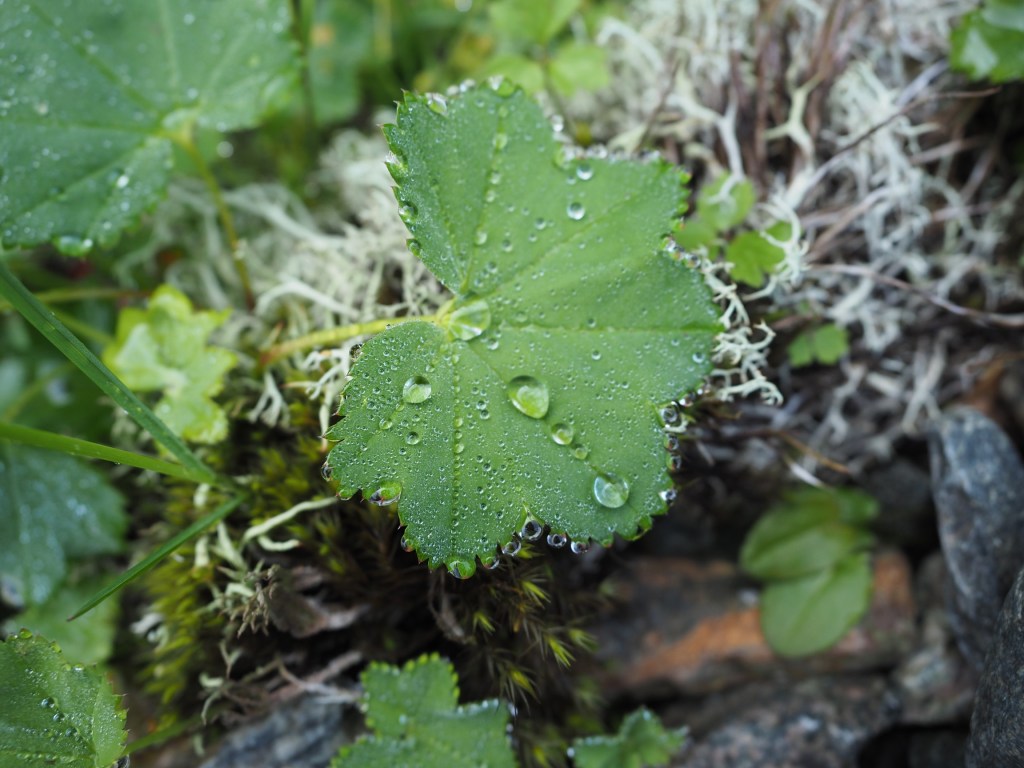
Sometimes it is impossible to take a photograph with enough sharpness. Tweaking the sharpness just slightly can help bring an extra crispness to an image. This is especially true in macro photographs, or photographs with fine detail. If the image is blurry, there is every likelihood that it can not be salvaged. There is only so much magic that can be performed by image processing. Here is a close-up of some water droplets on a leaf.
If we filter the image using some unsharp masking to sharpen the image, we get:
5︎⃣ Saturating colour
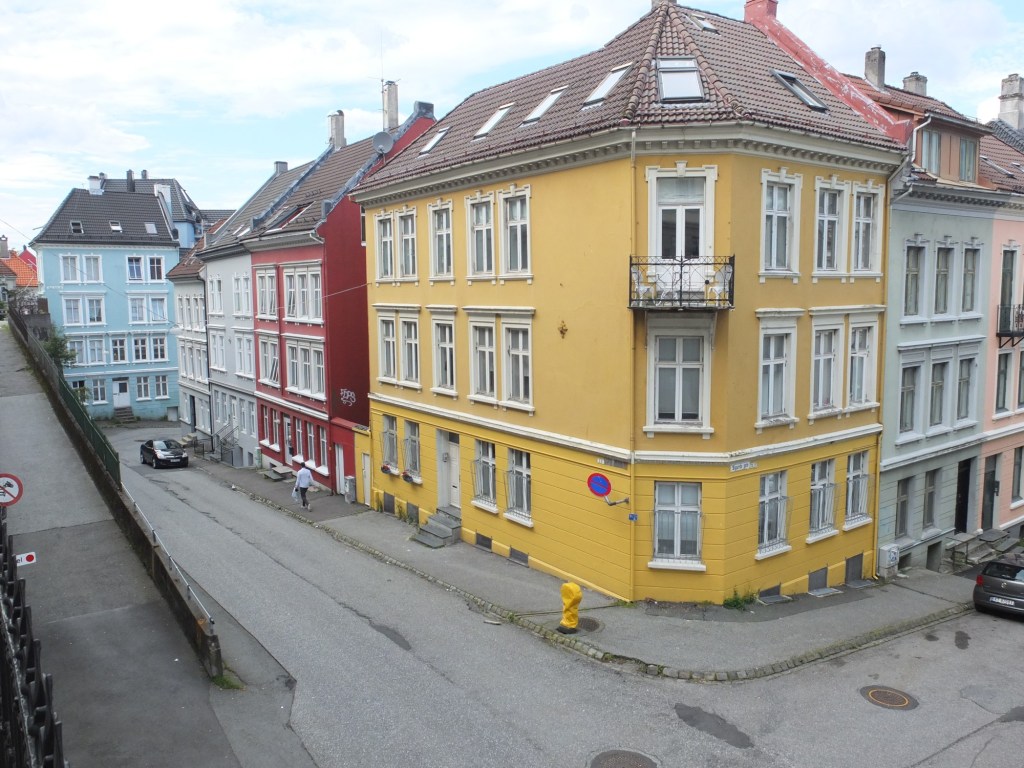
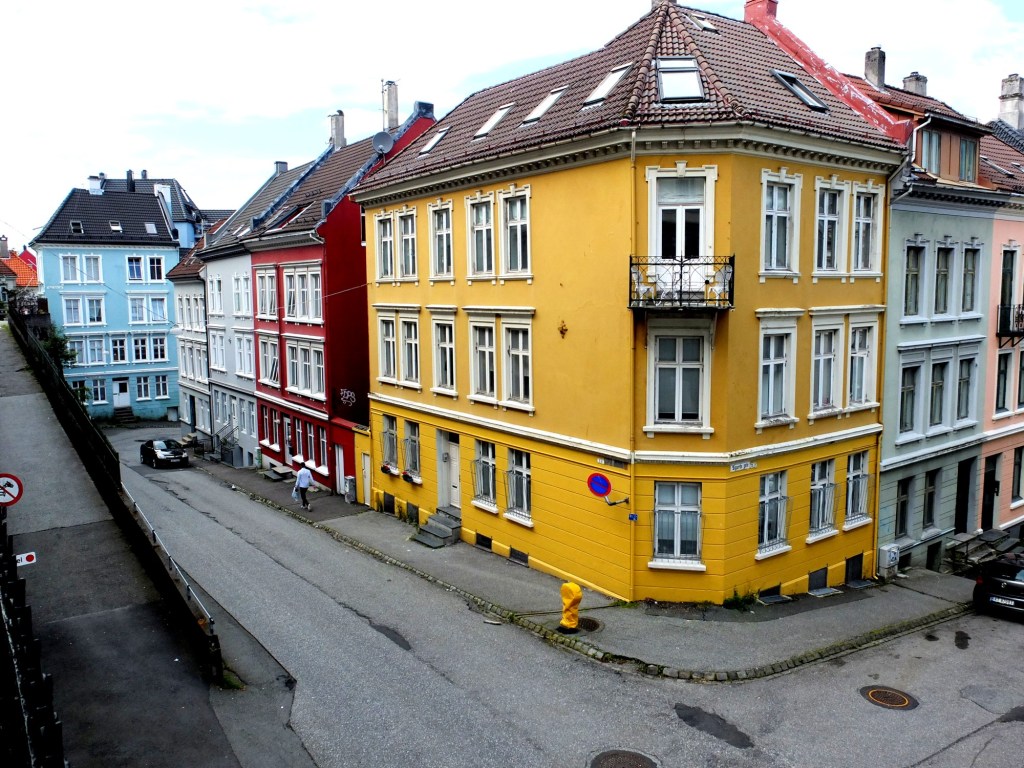
Photographs of scenes containing vivid colour may sometimes appear quite dull, or maybe you want to boost the colour in the scene. By adjusting the colour balance, or manipulating the colour histogram, it is possible to boost the colours in a photograph, although they may end up “unrealistic” colours in the processed image. Here is a street scene of some colourful houses in Bergen, Norway.
Here the image has been processed with a simple contrast adjustment, although the blue parts of the sky have all but disappeared.
When travelling, it is not always possible to get a perfect photograph. You can’t control the weather – sometimes it is too sunny, and other times there is not enough light. So the option of course is to modify the photographs in some way, fixing what is considered “unaesthetic”. The problem lies in the fact that cameras, as good as they are, don’t always capture a scene the way human eyes do. Your eyes, and brain correct for many things that aren’t possible with a camera. Besides which we are all tempted to make photographs look brighter – a legacy of the filters in apps like Instagram. Should we fix photographs? It’s one of the reasons the RAW file format exists, so we can easily modify an images characteristics. At the end of the day, we fix photographs to make them more aesthetically pleasing. I don’t own a copy of Photoshop, so I don’t spend copious hours editing my photographs, it’s usually a matter of adjusting the contrast, or performing some sharpening.
There is of course the adage that photographs shouldn’t be modified too much. I think performing hundreds of tweaks on a photograph results in an over-processed image that may not really represent what the scene actually looked like. A couple of fixes to improve the aesthetic appeal?
So what sort of fixes can be done?
1︎⃣ Fixing for contrast issues
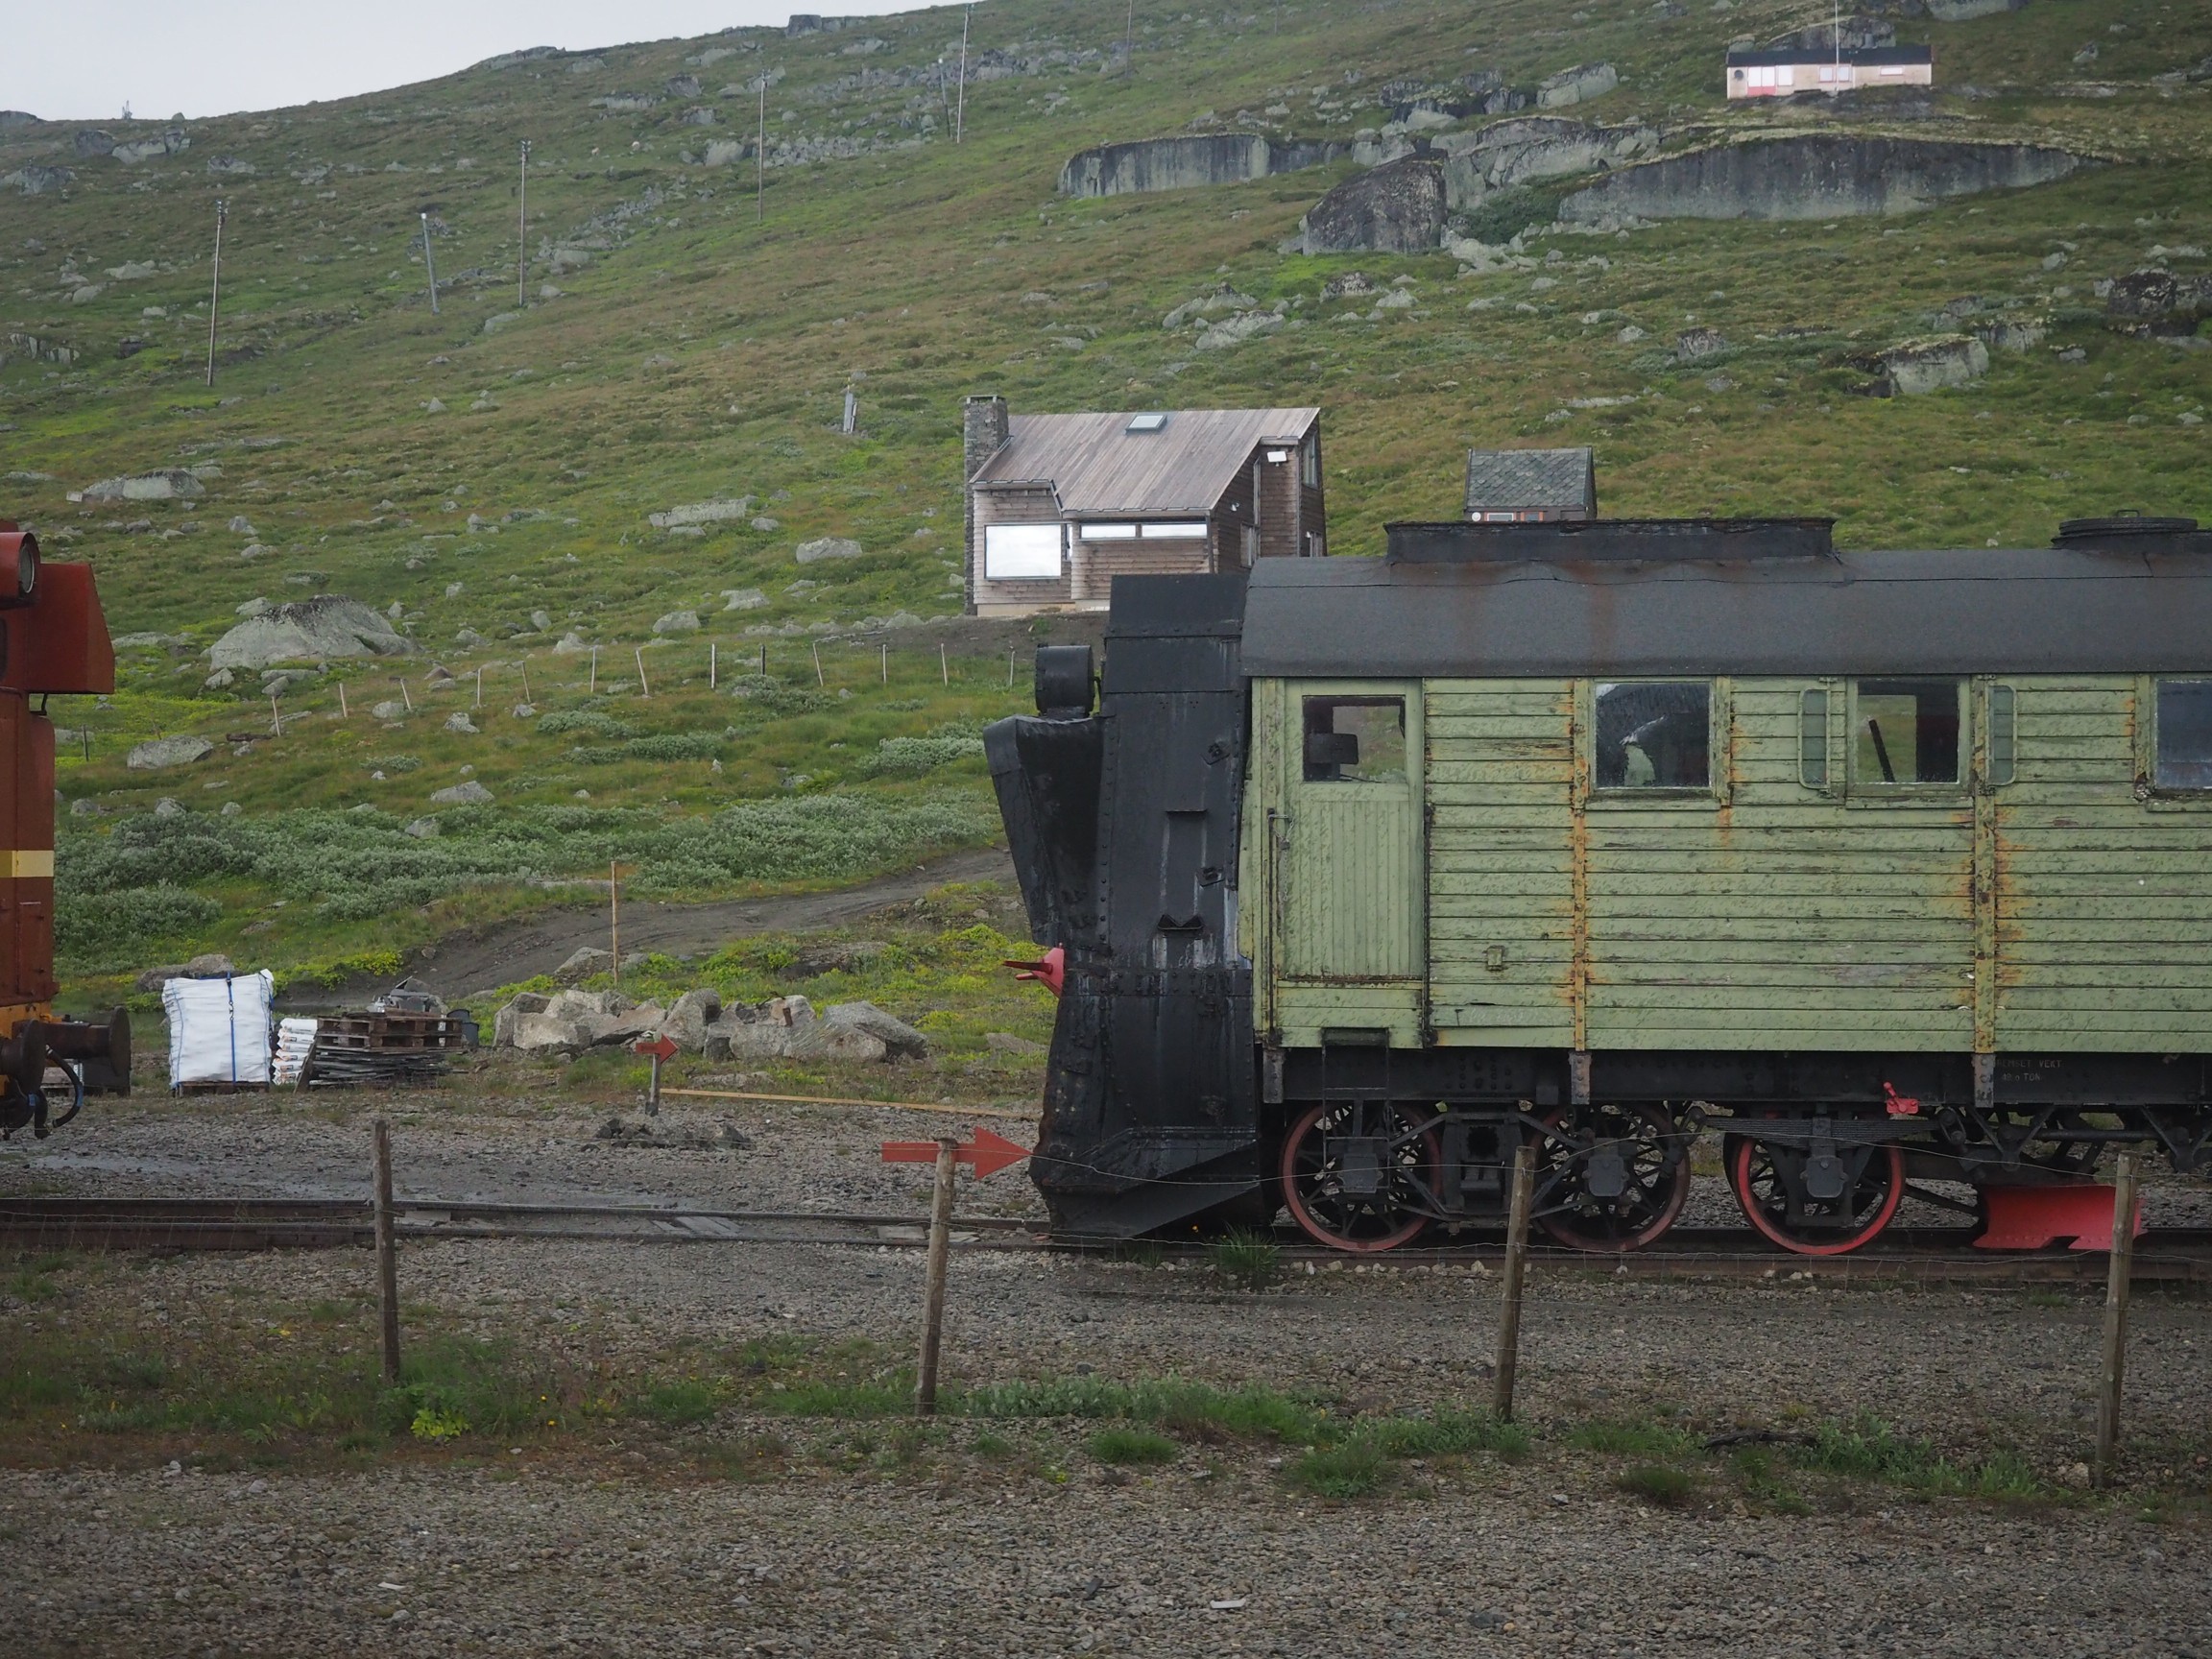
Sometimes its not possible to take a photograph with the right amount of contrast. In an ideal world, the histogram of a “good” photograph should be uniformly distributed. Sometimes, there are things like the sky being overcast that get in the way. Consider the following photo, which I took from a moving train using shutter-priority with an overcast sky.
A lack of contrast
The photograph seems quite nice right? Does it truly reflect the scene I encountered? Likely not quite. If we investigate the histogram (the intensity histogram), we notice that there is one large peak towards the low end of the spectrum. There is also a small spike near the higher intensity regions, most likely related to the light regions such as the sky.
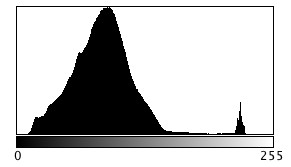
So now if we stretch the histogram, the contrast in the image will improve, and the photograph becomes more aesthetically pleasing, with much brighter tones.
Improving contrast
2︎⃣ Fixing for straight lines
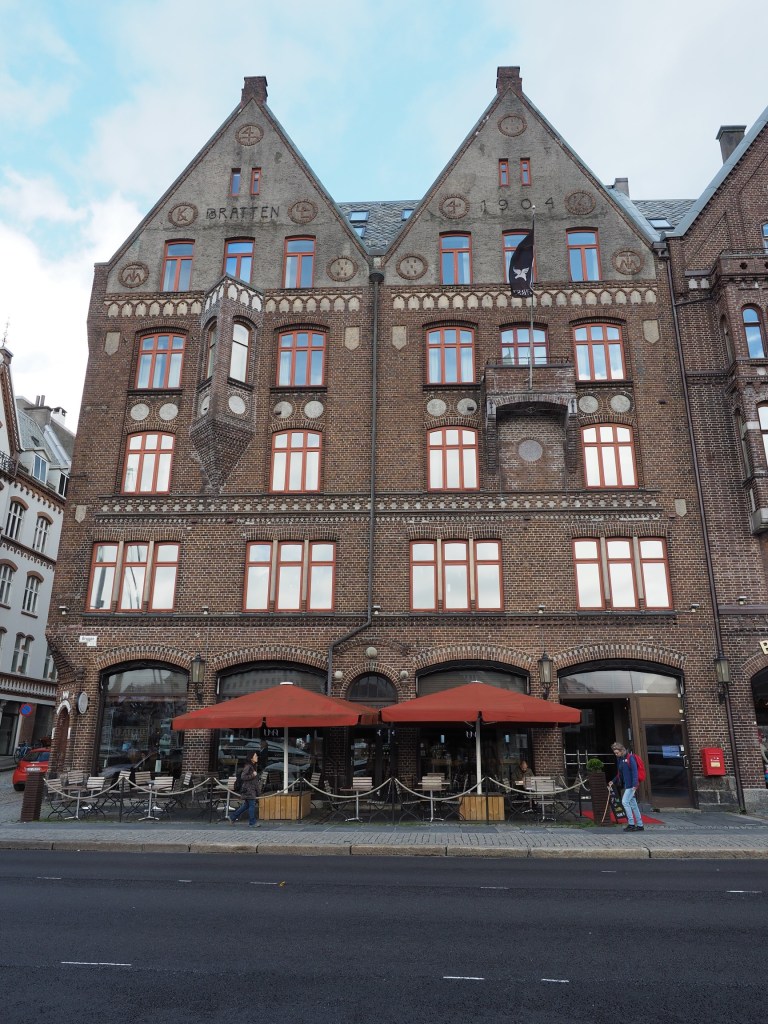
In the real world, the lines of buildings are most often straight. The problem with lenses is that they are curved, and sometimes this impacts the form of photograph being acquired. The wider the lens, the more straight lines converse to the centre of the image. The worse case scenario are fish-eye lenses, which can have a field of view of up to 180°, and result in a barrel distortion. Take a photograph of a building, and the building will appear distorted. Human eyes compensate for this with the knowledge that it is a building, and its sides should be parallel – they do not consciously notice converging vertical lines. However when you view a photograph, things are perceived differently – it often appears as though a building is leaning backwards. Here is an photograph of a building in Bergen, Norway.
An image askew, and corrected.
Performing a perspective correction creates an image where the vertical lines of the building are truly vertical. The downside is of course that the lower portion of the image has been compressed, so if the plan is to remove distortion in this manner, make sure to allow enough foreground in the image. Obviously it would be better to avoid these problems when photographing buildings.