Photographing large objects in the landscape

Photographing large objects in the landscape can be tricky. Some are near impossible, for example bridges. An exceptional example is the Landwasser Viaduct, part of the Rhaetian Railway in Graubünden, Switzerland. The best possible shot is taken from the valley beneath, preferably with a train crossing the viaduct, but that’s not a shot possible for everybody, because most people are on the train, and therefore won’t get anywhere near the perspective of a ground shot. It’s the same with many of these famous bridges, and viaducts. Some, like the Glenfinnan Viaduct, often known as “The Harry Potter Bridge“, are easier to photograph (there are some good instructions to help find the most optimal spots). Not to say that the Landwasser Viaduct can’t be photographed, there are also good commentaries on doing that as well.

Dunnotarr Castle in Scotland. Although the castle itself is not a “large” object, it becomes large when combined with the headland. If it wasn’t perched on a rocky headland, the resulting image would be quite flat, however the combination of man-made and natural features gives the photograph a great deal of depth.

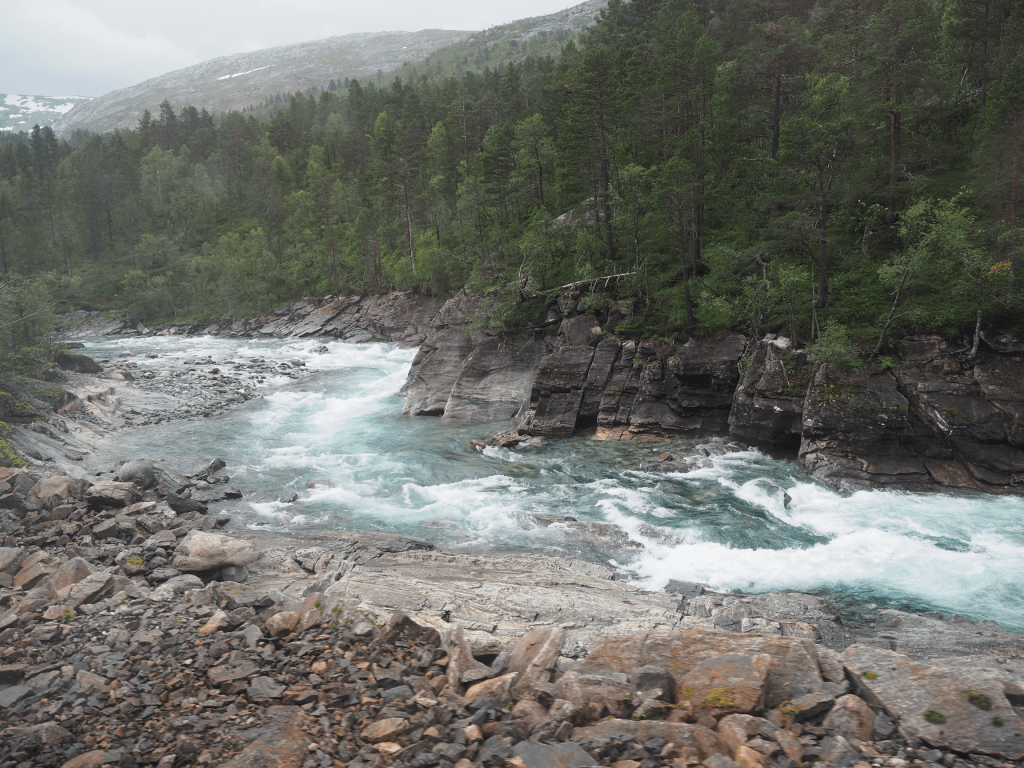
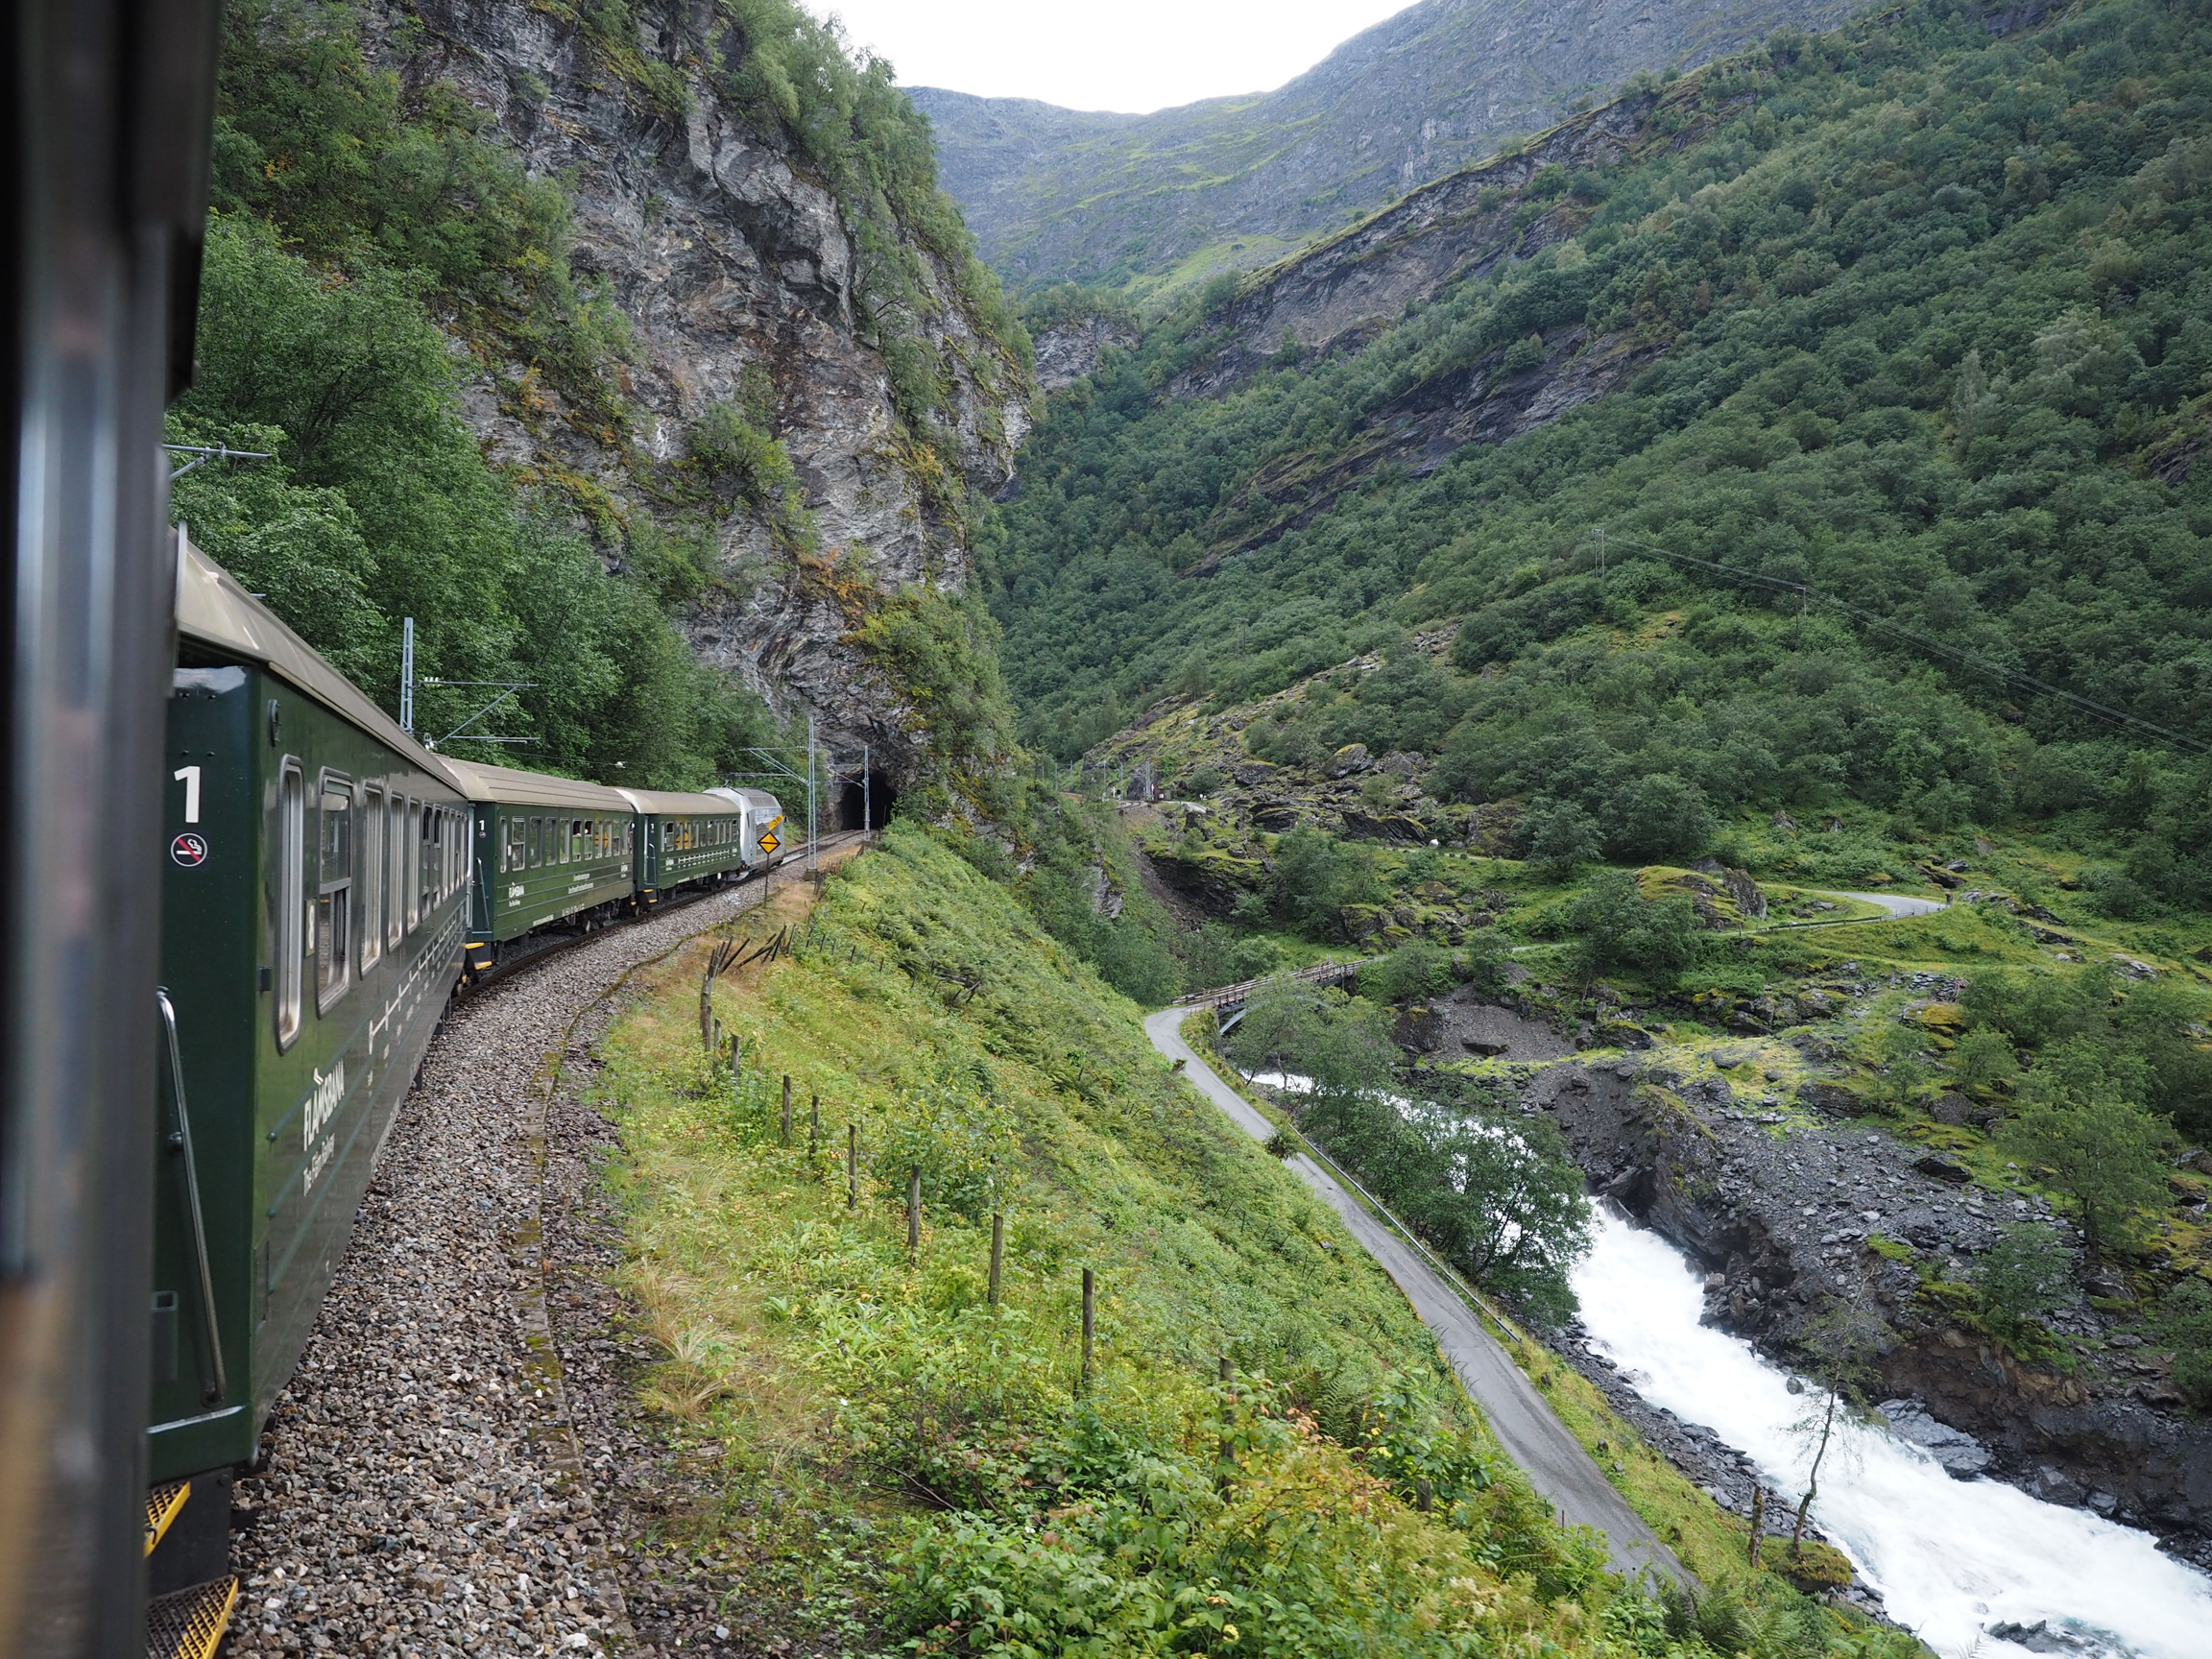
While train journeys are fun, actually photographing things from the train doesn’t always produce the images people expect. It’s the same with large objects of any sort. Sometimes the best images these days are taken using drones, because they are able to take in the whole landscape. But not everyone has a drone available, and in some places they have actually cracked down on them over the past few years. landscape scenes in Iceland are monumental when taken from a drone… these are perspectives of features like waterfalls that just can’t be achieved any other way. But at nearly every major tourist site in Iceland, you will see ‘No Drone’ signs, e.g. Gullfoss waterfall.

So if you are interested in photographing a large natural, or man-made object, what’s the best approach? There are two good methods. Firstly, shooting from a distance, to provide an overall outlook. This involves finding the best position that allows for an uninterrupted view, and makes an interesting shot. Secondly, shooting up-close, providing a near perspective of the object, photographing just a portion of the structure and bringing things like texture and intricate detailing into play. Describing an object visually should never be just a one-perspective deal. It should incorporate different granularity of details, which help describe the object as a whole. You also want to be cognizant that you don’t just create the same picture that the masses do.

The Culloden Viaduct from a distance.
A perspective view.

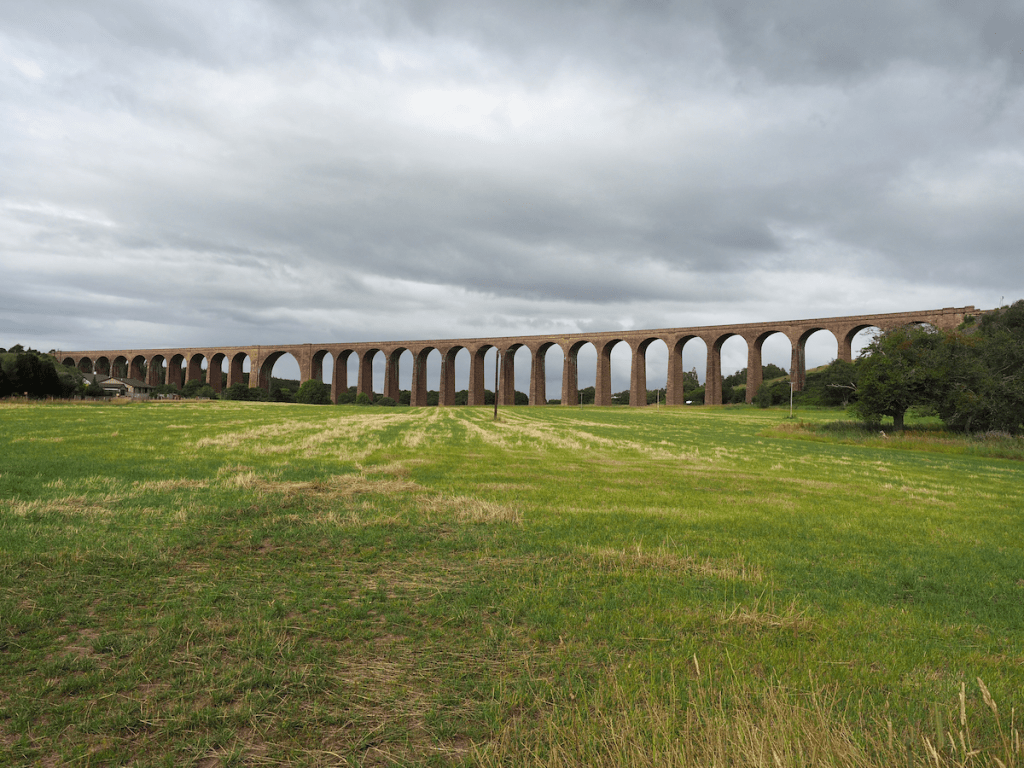
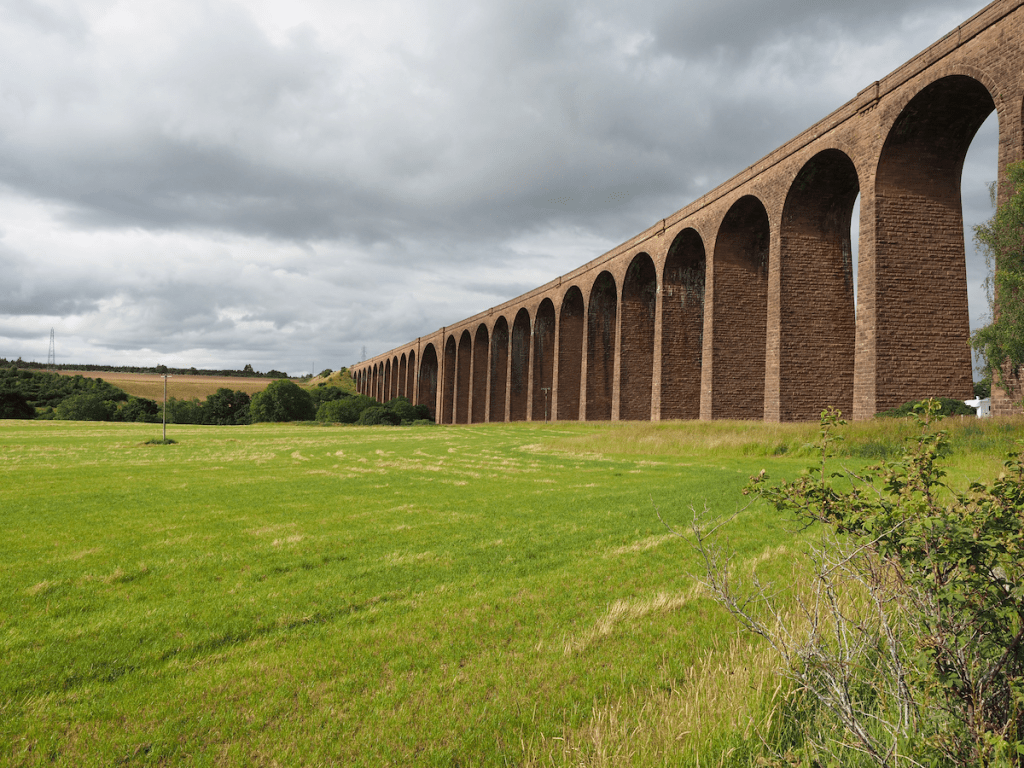
As a case in point, consider these photographs of Culloden Viaduct, just east of Inverness, Scotland. This is an easy viaduct to get both a distant shot, and close shots, as a road goes directly underneath the southern portion of the viaduct. There are many options here, shooting it from the distance to provide an overall viewpoint of the viaduct, or from one end to provide a perspective. The viaduct is a long linear feature, which means distance shots make it appear small in relation to the rest of the photograph. The photograph also feels “flat”, something that can be partially fixed by shooting from an elevated position (which is above the feature being photographed, and hence the value of drone-based photography). A perspective view will often allow the scale of the structure to be included, in addition to a more 3D feel.

The interplay of arches
A close-up view of the arches

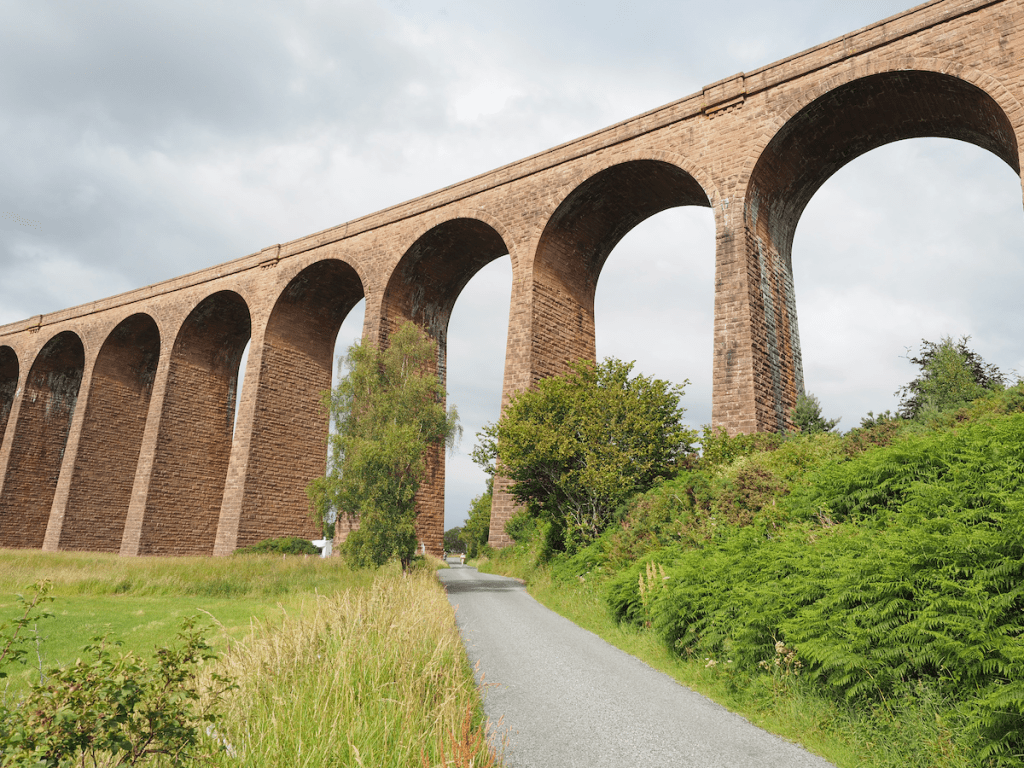
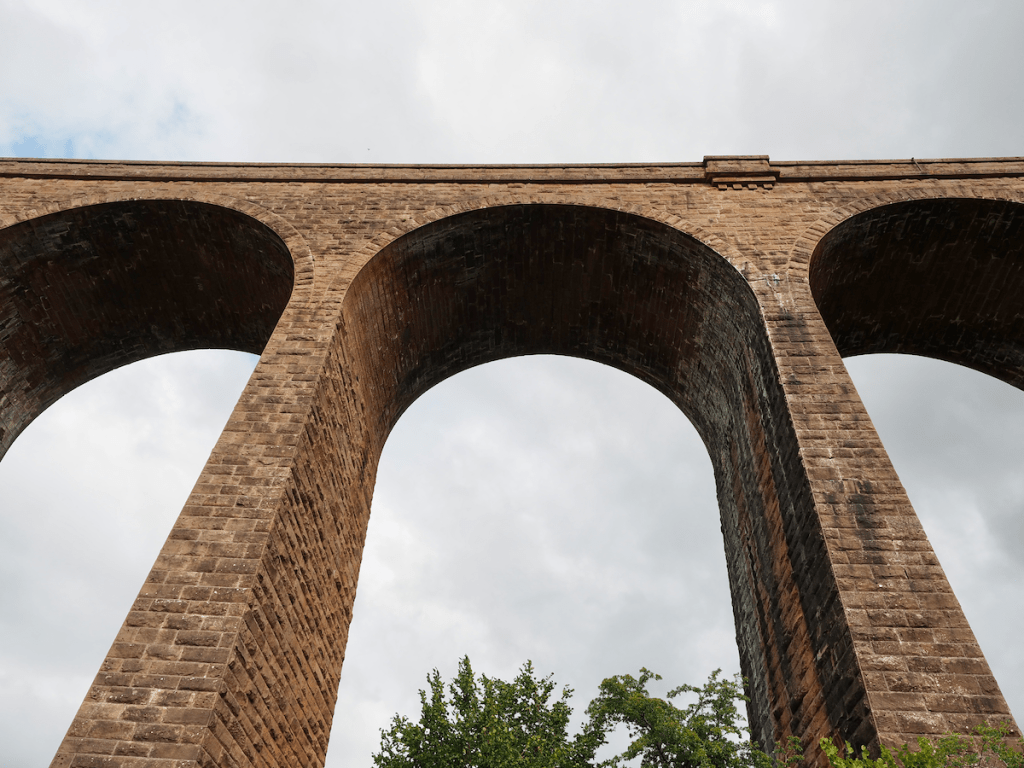
Close-up shots will fail to show the viaduct in its entirety, but will instead portray more architectural details, in this case, the design of the arches. It also provides more of a three-dimensional perspective of the viaduct than long-distance shots. it is the arches that make this viaduct interesting, and a distance shot will not do them justice. A close-up view exposes the tapered structure of the piers, and the precise nature of the arches. You can even goes as far as taking shots of individual components of an object to illustrate things like texture, and interplay of materials.

P.S. Naturally, aerial shots acquire with a drone do provide much more of a perspective of an object in the context of its surroundings, but that isn’t always realistic for the average photographer.

Shooting photos from a train

Someday you might be in a situation one day where you will need to take photographs through a window. For example travelling on one of the many of the worlds great rail journeys, which often provide scenery which is impossible to see otherwise. Rail trips that are specifically touted as being “scenic journeys” will often have an observation car with large windows, panoramic windows that take in a view of the sky as well, or an open-air carriage, like that found on the Northern Explorer from Auckland to Wellington (in New Zealand). The problem is that not all trains offer a glass-free interface between you and the scenery.

The biggest problem with photographing through windows is that glass (or perspex) is usually not that clean, often plagued by dust and dirt, things about which you can do little or nothing (well you can clean the inside, but not the outside). If it isn’t in a filmy layer of dirt, or a streak, there is likely very little to worry about. Since you will be focusing on distant objects when shooting from a moving train, nearby dirt specks likely will be of little worry, as they will barely show on a photograph. This becomes more problematic in direct sunlight which can emphasize dirt, streaky panes, and dust smears. Obviously, the best thing to do is to try and find a piece of glass that is pretty clear to shoot through. There may be a chance that there are also windows that can be opened.

A shot of a river along from the Bergen Line west of Myrdal (Olympus E-M5Mark II, 12mm, f/2.8, 1/1000)

Another two issues when shooting through glass are reflections and glare, but they can be alleviated by placing the lens hood directly up near the glass (but don’t press the lens against the glass because that can transfer vibrations from the train to your camera). Select a reasonably sized aperture which will reduce the impact caused by details from the glass (e.g. dirt), but not too large as it might impact depth-of-field. Note that the best results will be achieved using manual focus. Shooting through glass (or even wire mesh), the auto-focus can be misled by the surface and may not focus beyond. Autofocus can also take a while to focus, which can lead to you missing the shot. Trains generally move fast, so if you hesitate you loose the shot.

Glare due to the sun peaking out from behind the clouds directly at the window. Bergen Line (Olympus E-M5Mark II, 12mm, f/3.5, 1/1000)
Whoops, pushed the shutter at the wrong moment – nice photo if it wasn’t for the pole. Bergen Line (Olympus E-M5Mark II, 12mm, f/6.3, 1/400)

Here are some general tips:

  • Use continuous shooting mode, because it allows taking many photos at once which in turn means a few may produce really good photographs.
  • Use a polarizing filter to cut some of the reflections.
  • Use fast shutter speeds (and shutter-priority) to compensate for the train’s movement and vibration. Start with 1/500 for distant subjects, and 1/1000 to 1/2000 for nearby ones. Direction matters as well, so moving towards or away from a subject (rather than crossing laterally in front of it) usually allows for a lower shutter speed.
  • Use a wide-angle lens, since the short focal length helps to minimize movement.
  • An overcast sky is better than sunshine or rain. Too much sun will produce shadows and reflections, and rain will end up creating an artistic distortion effect when you shoot through the window.
  • Do research before the train trip to find notable sights, especially where the train may curl itself on a tight curve.
  • There will always be some form of blur in the image. The closer to the horizon, the less blur there is, because the train is moving slower with respect to distance closer to the horizon (i.e. motion parallax).
Running rapids alongside the Flåm Railway (Olympus E-M5Mark II, 12mm, f/2.8, 1/400)

Train speed also plays a factor, both in the shutter speed settings, and timing shots. The Norwegian Flåm Railway which travels between Myrdal and Flåm is an extremely scenic journey (if you can ignore the hoards of tourists). The train journey takes about 60 minutes and travels at a leisurely 40kph along the 20.2 kilometres. Conversely the Bergen Line, all 493km from Oslo to Bergen, the train will travel an average of 70kph.

View of a train on a slight curve, Flåm Railway (Olympus E-M5Mark II, 12mm, f/2.8, 1/800)
Windows that open on the Flåmsbana, Flåm Railway (iPhone 6s, 4.15mm, f/2.2, 1/192)

It is possible to successfully take pictures through glass on a moving vehicle. The caveat is of course that there has to be good scenes to take photos of. For most of the VIA rail trip from Toronto to Montreal, there isn’t a lot to see because the railway line sits level to the surrounding area, and passes through somewhat monotonous scenery (the train travels at 100kph). Some of the best photographs can actually be taken approaching Montreal, when the train slows down. Conversely, train trips like those in Norway offer a richness of photographic scenery. Just remember not to forget those who ride on the train as well.

Don’t forget the human story side to a train journey (Olympus E-M5Mark II, 12mm, f/2.8, 1/800)