How good is High Dynamic Range (HDR) photography?

There are photographic situations where the lighting conditions are not ideal, even for the most modern “smart” camera – and they occur quite often. On vacation, taking landscapes, with the vast contrast difference between the sky and land, or low-light situations, scenes with shadows. These situations are unavoidable, especially when on vacation when the weather can be unpredictable.

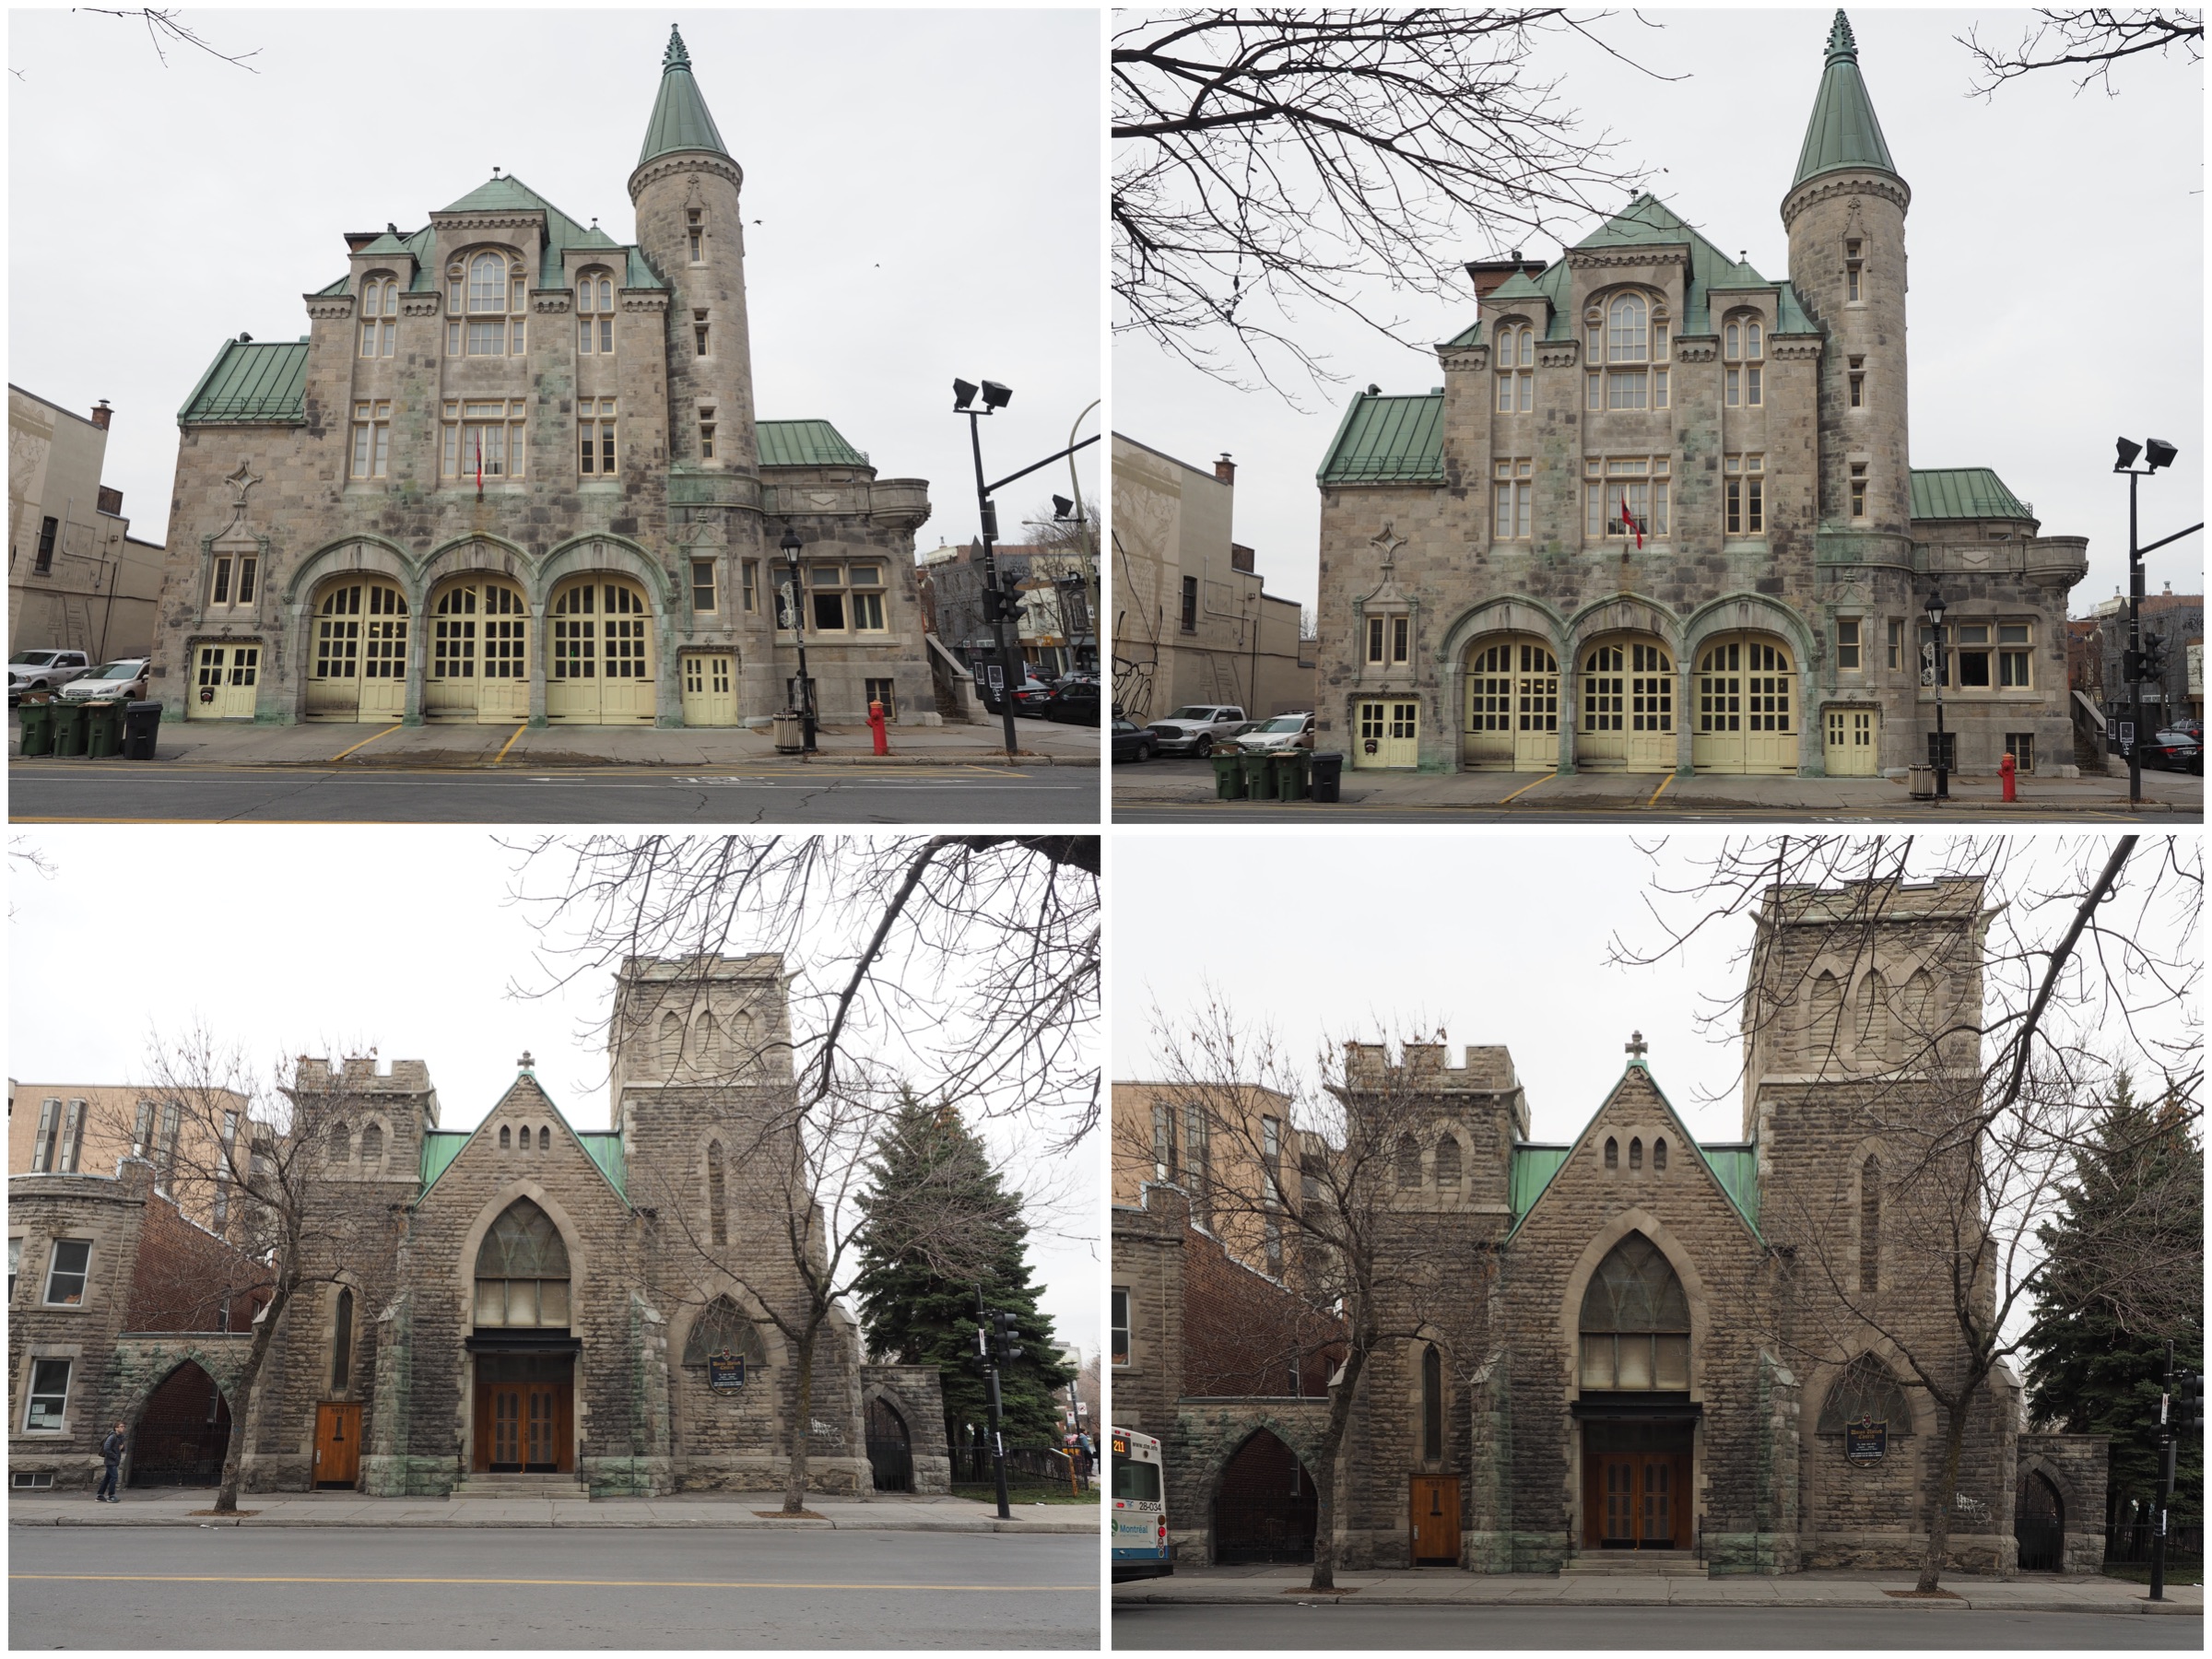
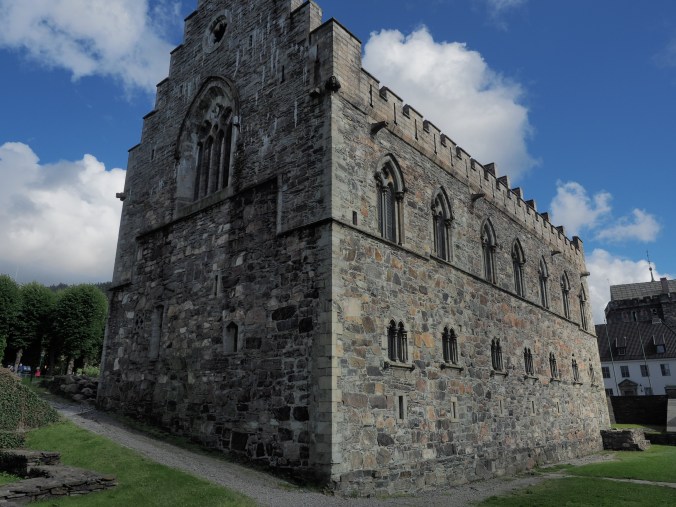
The problem is one of perception. A scene that we view with our eyes, does not always translate into a photograph. This is because the human eye has more capacity to differentiate between tones than a camera. A good example of this is taking a photo from the inside of a building, through a window – the camera will likely produce an underexposed room, or an overexposed sky. Here is an example of a photograph taken during a sunny, yet slightly overcast day. One side of the building is effectively in shadow, whilst the other side is brightly lit-up.

HDR photography before shot

Olympus EM-5(MII), 12mm, f8.0, 1/640, ISO200 (P mode)

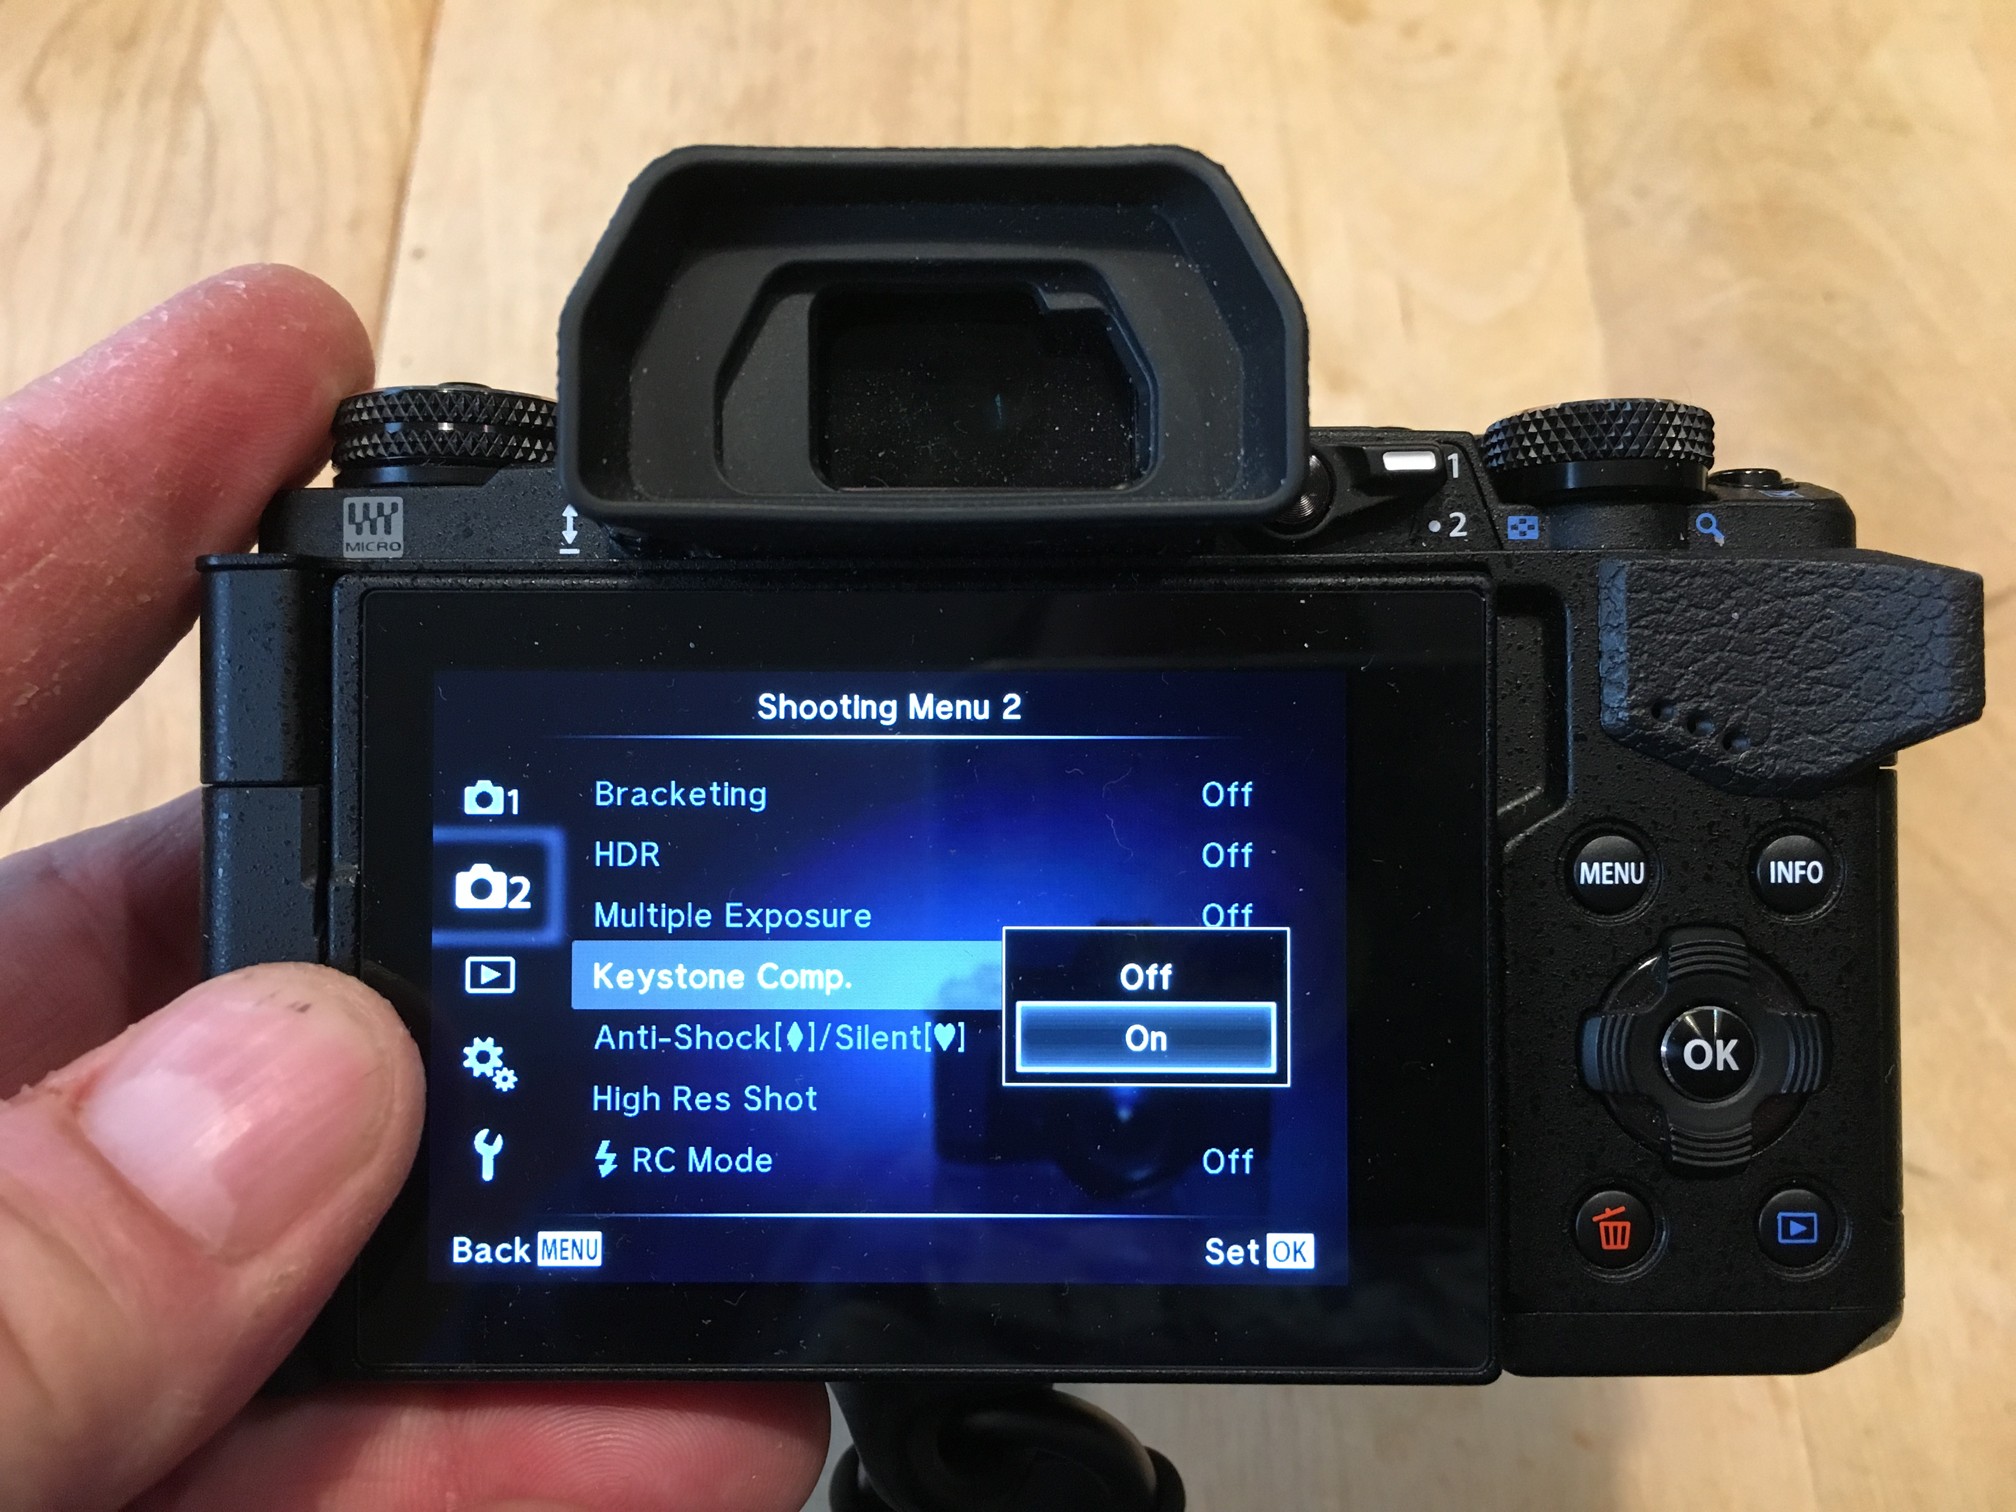
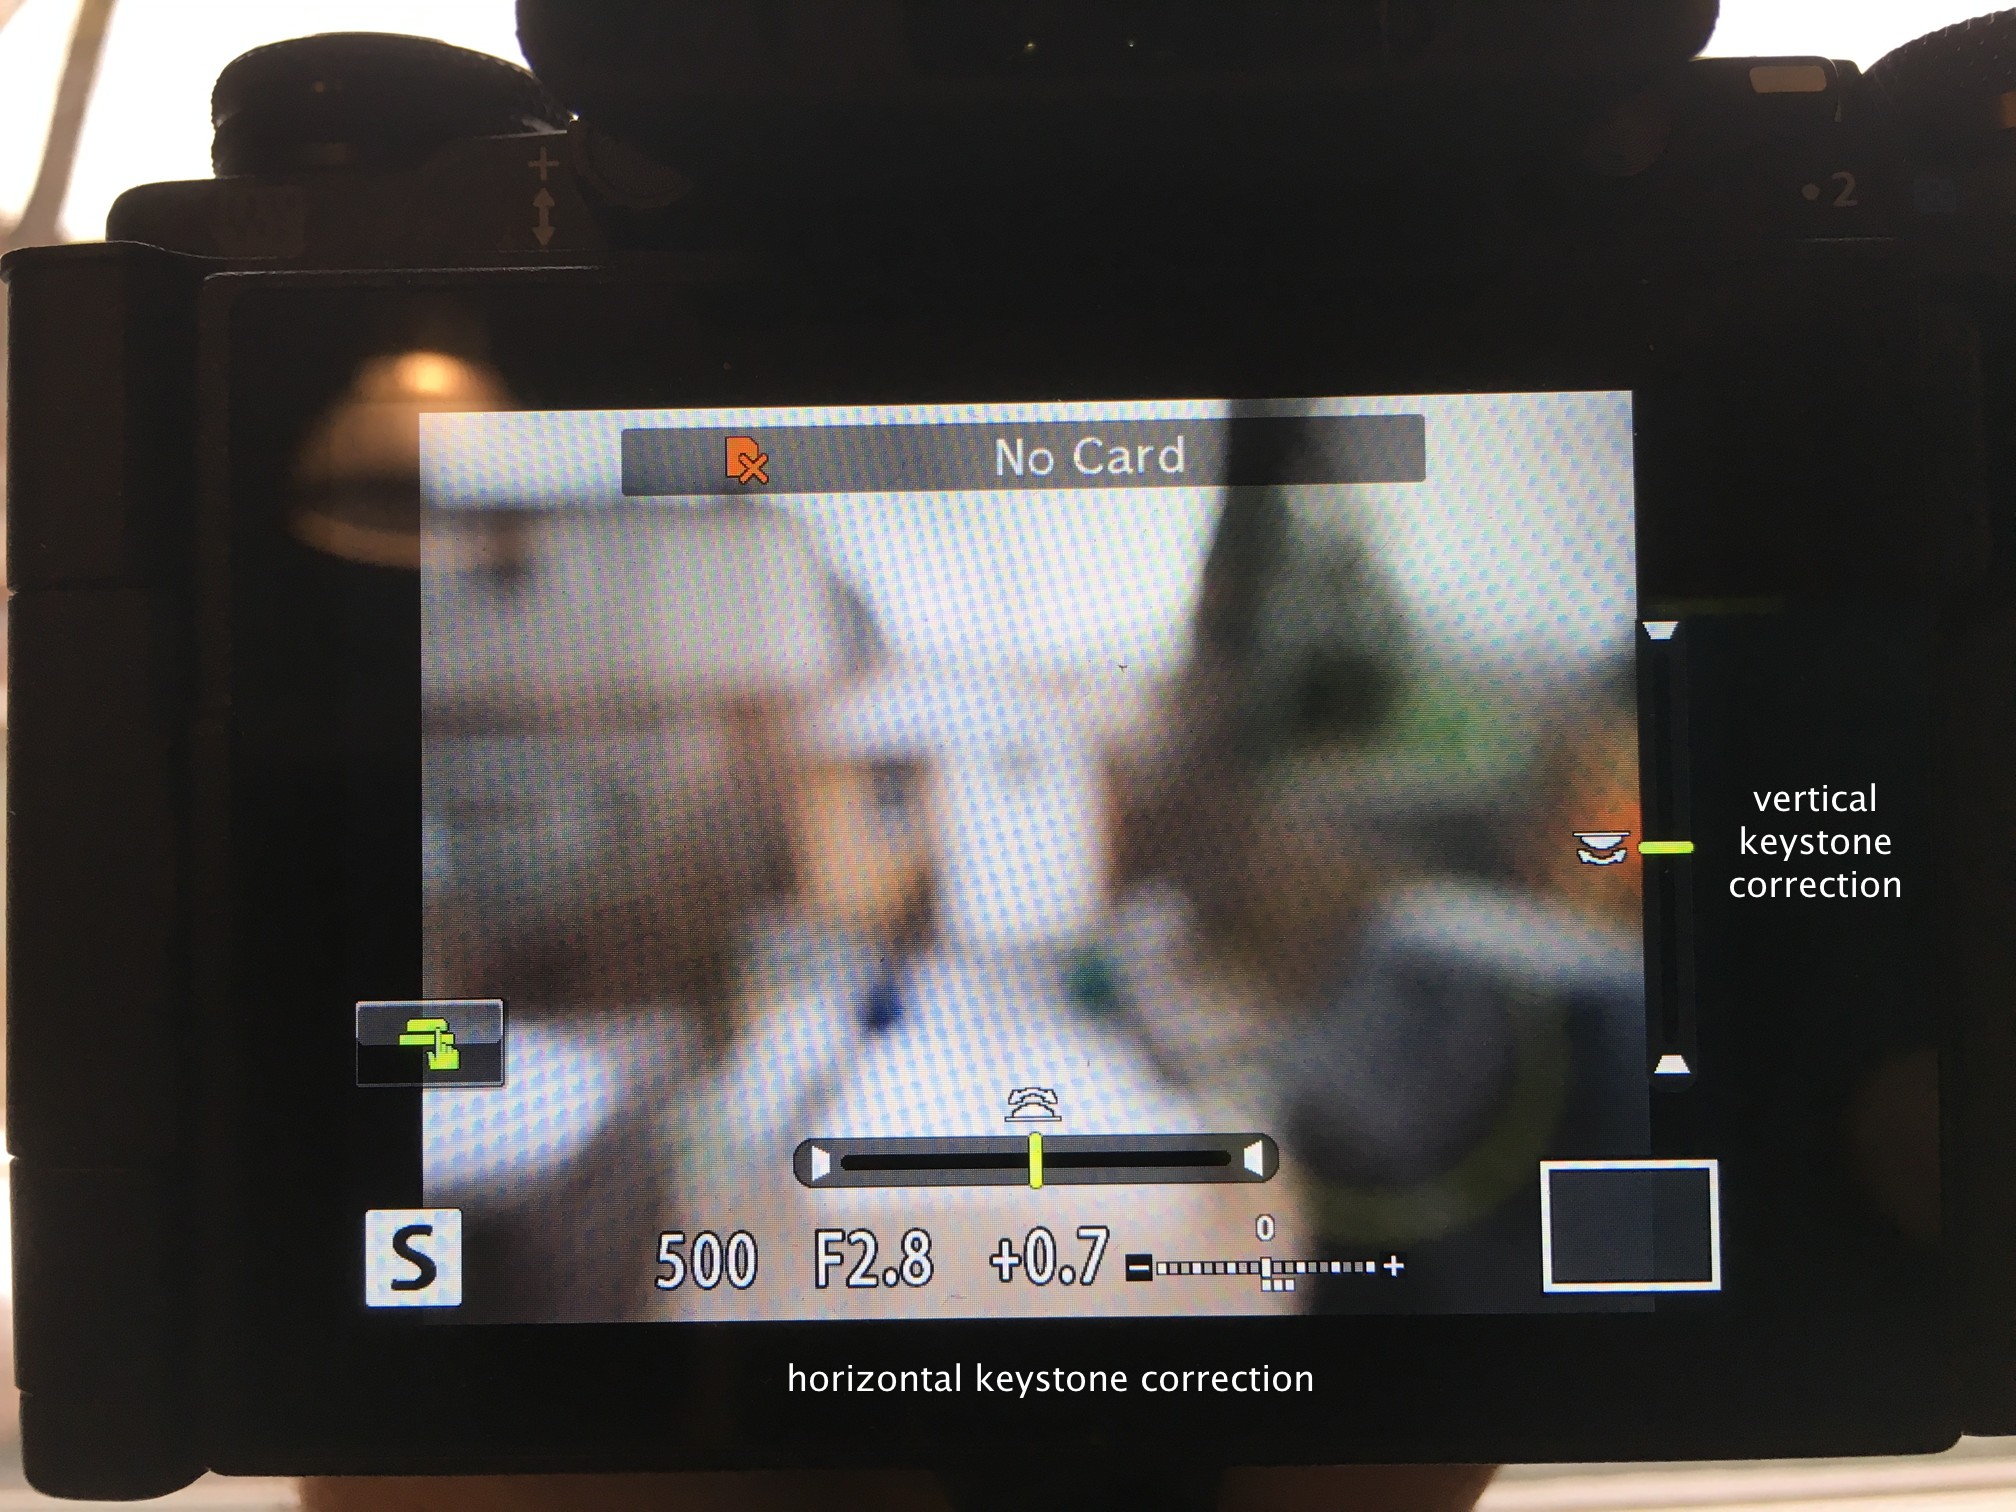
One way of compensating for the inability of a camera to take a good photograph in these situations is a computational photography technique known as High Dynamic Range(HDR). HDR is a technique which can be applied in-camera, or through an application such as Photoshop. For example, a camera such as the Olympus EM5(Mark II), has a button marked HDR, and even the iPhone camera has a HDR function.

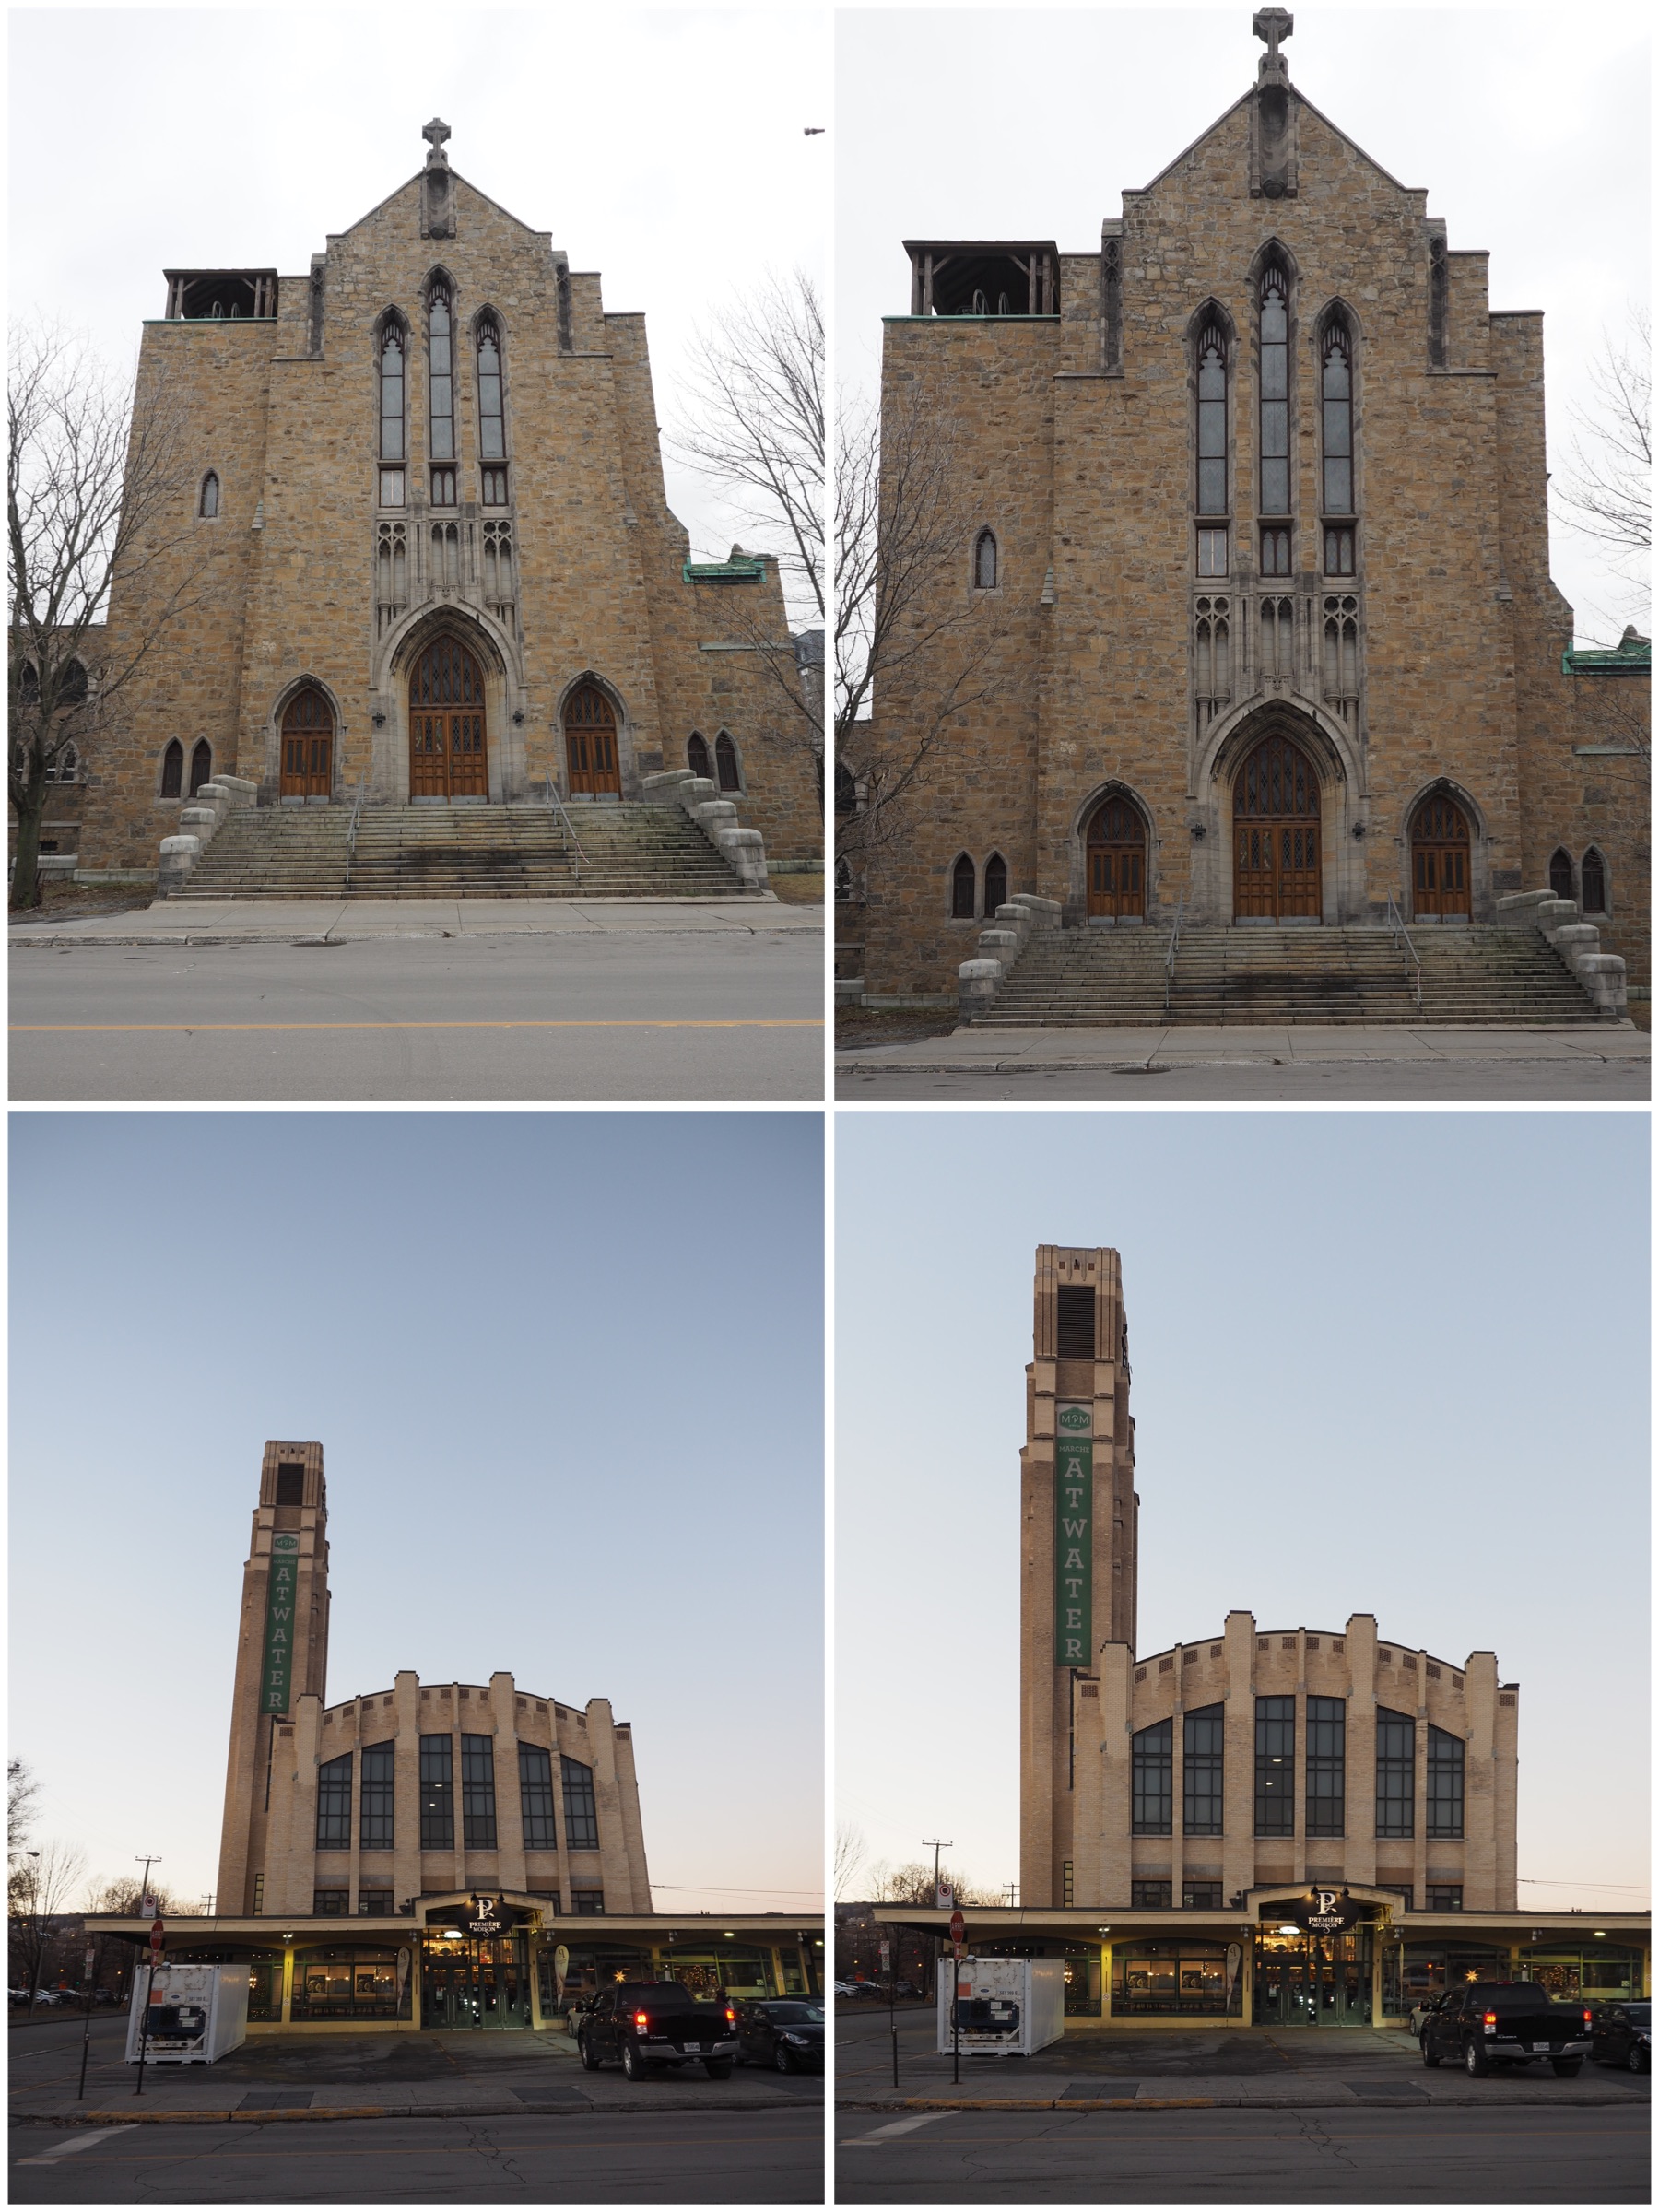
In its simplest form, HDR takes three images of the exact same scene, with different exposures, and combines them together. The three exposures are normally (i) an exposure for shadows, (ii) an exposure for highlights, and (iii) an exposure for midtones. This is sometimes done by modifying the shutter speed, and keeping the aperture and ISO constant. Here is a HDR version of the photograph above, with the effect of the shadow very much reduced. Is it a better image? That is in the eye of the beholder. It does seem to loose something in translation.

HDR photography after processing

Olympus EM-5(MII), 12mm, f7.1, 1/500, ISO200 (HDR)

But HDR is not a panacea. – it won’t solve everything, and should be used sparingly. it is sometimes easier to perform exposure bracketing, and choose an appropriate image from those generated.

In-camera keystone compensation (Olympus) (ii)

So I took some photographs using the Olympus keystone compensation on a trip to Montreal. Most of them deal with buildings that are leaning back, which is the classic case when trying to photograph a building. The first set deal with some landscape photographs. In both these photographs I could not move any further back to take the photographs, and both were taken with the Olympus 12-40mm, set as wide angle (12mm or 24mm full frae equivalent).It was possible to correct both images, without loosing any of the building.

keystone correction of photographs
Originals (left), keystone corrected (right)

The second case deals with portrait format photographs. In both cases it was slightly more challenging to make sure the entire picture was in the frame, but doing it in-situ it was possible to assure this happened. Doing in post-processing may result in the lose of a portion of the photograph. In the lower image I had enough leeway to position the keystone-corrected frame in such a manner that the building is surrounded by ample space.

keystone correction of photographs
Originals (left), keystone corrected (right)

Compensating for perspective distortion often comes at a price. Modifying the geometry of a photograph means that less will fit in the photograph. Taking a photograph too close to a building may mean something is cut off.

Horizontal keystone correction can sometimes be more difficult, because the distortion is usually a compound distortion. In the example below, the photograph was taken slightly off-centre, producing an image which is distorted both from a horizontal and a vertical perspective.

keystone correction
Complex distortion

Is there a loss in aesthetic appeal? Maybe. Food for future thought.

In-camera keystone compensation (Olympus) (i)

The Olympus OM-D EM5 Mark IIhas a completely cool feature they call keystone compensation. It’s a kind-of weird name – but dig a little deeper and you run into the keystone effect  which is the apparent distortion of an image caused by projecting it onto an angled surface. It basically makes a square look like a trapezoid, which is the shape of an architectural stone known as a keystone. Now normally when you take a photograph of a building, this effect comes into play. Reducing the keystone effect is called keystone correction. There are special lenses that remove this distortion, i.e. tilt-shift lenses. Now Olympus has introduced an algorithm which compensates for the keystone effect. Here is an example of keystone correction (distortion is shown as the opaque pink region).

keystone correction
Keystone correction before (left) and after (right)

Olympus has introduced an algorithm on some of their cameras (e.g. EM5ii) which compensates for the keystone effect. First, you have to enable Keystone Correction in “Shooting Menu 2”.

Olympus EM-5(ii)
Turning on keystone correction on an Olympus EM-5(ii)

Then it’s a simple matter of using the front or rear dial for correction. The front dial is used to horizontal correction, and the rear dial is used for vertical correction. Note that it doesn’t allow for both types of keystone compensation to be used at the same time. If you decide to change from vertical to horizontal correction, you have to reset the vertical component to 0. Frame the shot and adjust the effect in the display using the front and rear dial. Select the area to be recorded using the directions buttons (surrounding the OK button).

keystoneOLY4
Keystone correction screen

The only trick is using the INFObutton to switch between keystone compensation and making adjustments to exposure compensation. In fact if you are using keystone correction often, I would program it into one of the function buttons.

Keystone Compensation mode enables keystone distortion to be corrected when shooting architecture and product photography without resorting to tilt-shift lenses or post-processing corrections in Photoshop.